

Hey guys,
In this post I’m going to show you how to create an iOS distribution certificate, provisioning profile and an APNS certificate. Most of the problems people face with getting Push notifications to work, are due to issues with these two certificates. So you should know how to generate these properly or you may face issues with Push notifications in your app later on. So let’s get started.
First off, you must have a valid development account on the iOS portal and must be subscribed to the iOS Developer Program in order to get a Signed Production Certificate and generate a provisioning profile for your app. Once you have access to the iOS Developer portal just follow the steps below.
Log in to the iOS Dev Center . When you do that you’ll see the following screen. Click on Identifiers (as shown below)

Now, go to App IDs under the ‘Identifiers’ tab in the sidebar and click on the ‘+’ button (as shown below).

Enter the name of your app (App ID). Let’s call it “MyFirstIPhoneApp” (as shown below).

Next, enter the Explicit App ID (bundle ID) of your app. Although you can use any identifier for this, the recommended practice is to use a reverse domain name style for the bundle id.

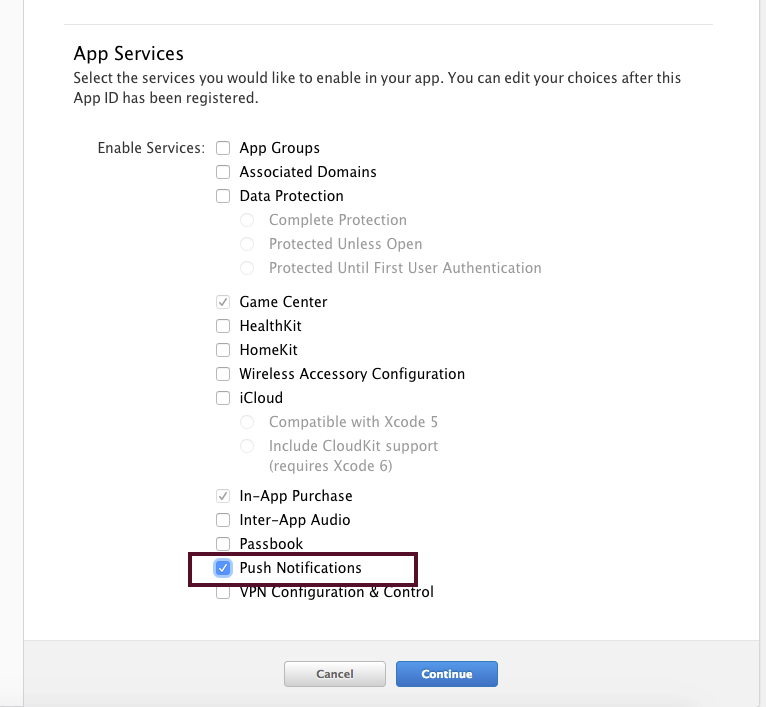
Now, check the Push Notification checkbox and hit the ‘Continue’
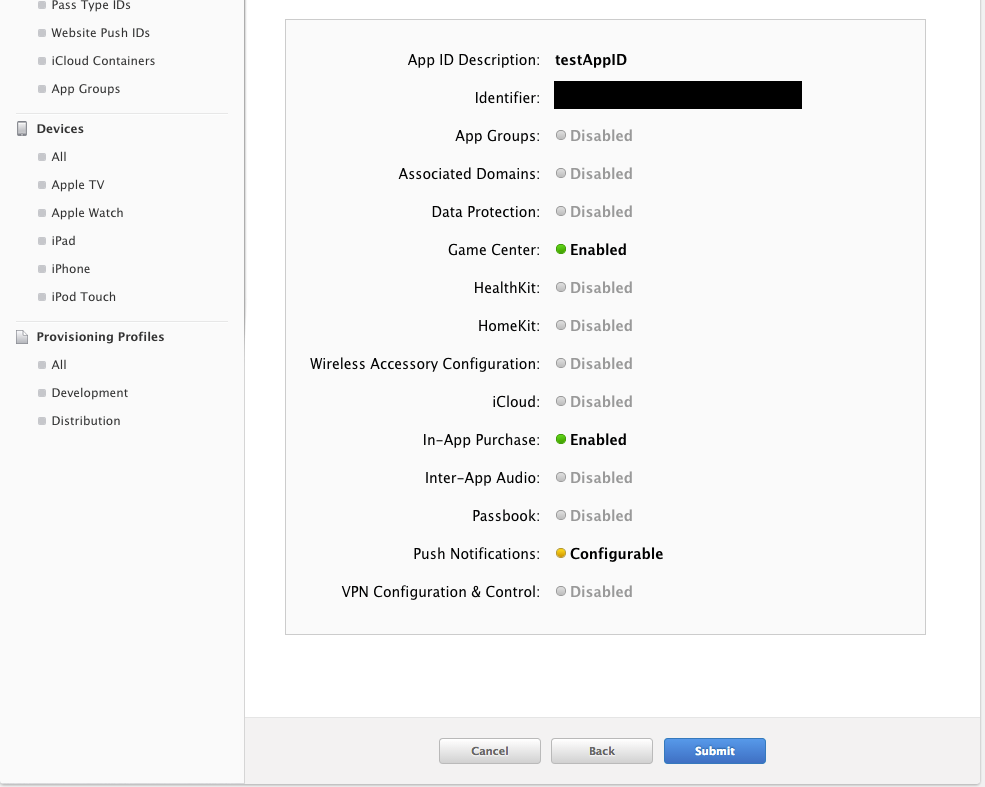
Next, click on Submit (as shown below). Once you do that, the App ID is registered.
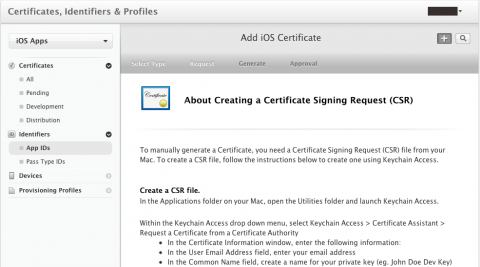
Next you’ll need to generate an SSL. To do that you’ll need to provide a Certificate Signing Request (CSR) to the certificate authority (in this case that is the iOS Developer Portal). The SSL certificate will be generated in response to that request, based on the information provided in CSR.
To generate the CSR open the Keychain Access on your Mac (under Applications/Utilities) and choose the Request a Certificate from a Certificate Authority…. Option as shown below.

If you don’t see this option listed or if it says “Request a Certificate from a Certificate…” check to make sure no private key is selected in the main Keychain Access window
After successful installation of the SSL you should see the following window:

Enter your email address in User Email Address field. You can use the same email address you used to sign up for the iOS Developer Program or any other valid email address.
In the Common Name field just enter any descriptive text. This field allows you to easily find the private key later. Check Saved to disk option and click Continue
Now, log in to the iOS Dev Center. When you do that you’ll be presented with the following screen.
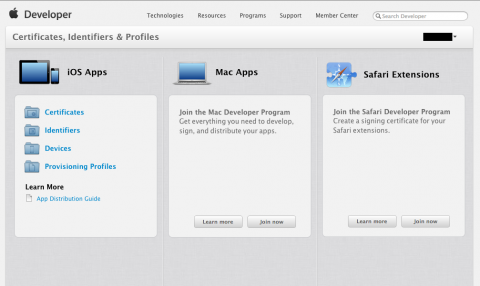
Click on the Certificates, Identifiers & Profiles option. When you do that you’ll see the following screen.
Since you’re making an iOS app select Certificates from the iOS Apps section. Now we’re going to make a new iOS distribution.
Go to Production under Certificates in the sidebar and click the + button (as shown below)

Select In-House or Ad Hoc distribution and click on Continue.
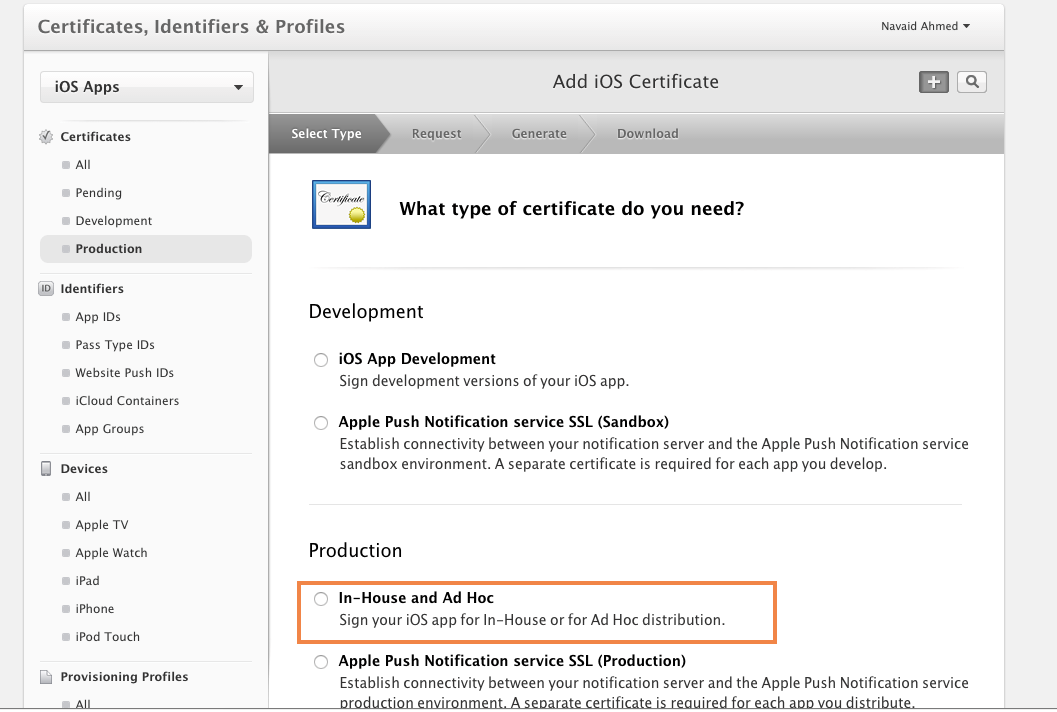
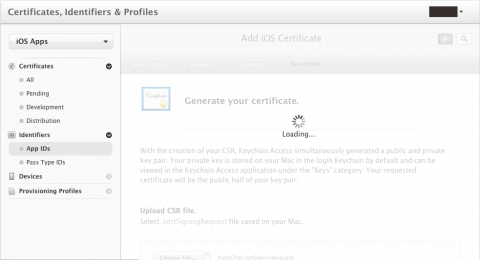
When you do that, the “Add iOS Certificate” wizard screen will appear (shown below)
The first thing that it’ll ask you is to generate a Certificate Signing Request. Since you’ve already done that just click Continue. In the next step it’ll ask you to upload the CSR. Choose the CSR file that you generated earlier and click Generate (as depicted below).

It’ll take a few seconds to generate the distribution certificate. Click Continue when it’s done. Now click Download to get the certificate, it’ll be the one named “ios_distribution.cer”
To enable PUSH notifications in your app, the above certificate needs to be signed with a provisioning profile that is configured for APNS PUSH notifications. Additionally, your server also needs to sign its communications to APNS with an SSL certificate.
The provisioning profile and SSL certificate are closely tied together and are only valid for a single App ID. This is a protection mechanism which ensures that only your server can send PUSH notifications to instances of your app, and no one else.
As you know, apps use different provisioning profiles for development and distribution. As such there are two types of PUSH server certificates, Development and Production. The differences between these 2 types of certificates is as follows.
In this post, the distribution profiles and certificates I’ve used are the ones for production.
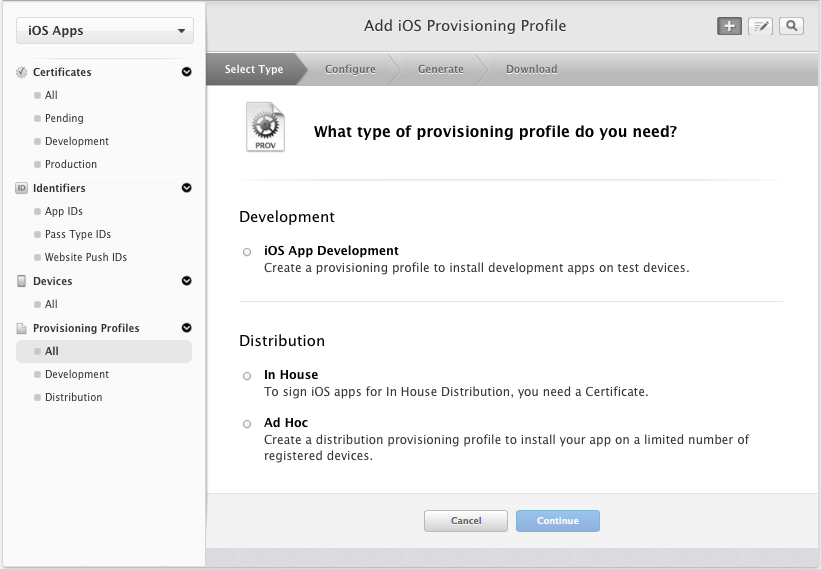
Moving back to our tutorial. Click the Provisioning Profiles button in the sidebar and click the + button (as shown below).

This will open up the iOS provisioning profile wizard.
On this screen just Select ‘Type’ and then the “In House” option from the Distribution section in the first step of the wizard and hit Continue
To configure your provisioning profile, just select your app id (that you created above) as shown below. This will ensure that this provisioning profile is explicitly tied to your app.

Now let’s generate the provisioning profile. To do that just select the certificate you created above, to include in the provisioning profile (as depicted below).

Next we need to name this profile. To do that, enter the name for provisioning profile in the Profile Name field and click on Generate (as shown below).

Now you can download the provisioning profile and share it with the development team, to associate it with your iOS client application.
In our final step we’re going to create the APNS certificate. To do that click the Certificates button in the sidebar and click the + button (as depicted below).

Now, select the Apple Push Notification service SSL (production) option and click on Continue (as shown below).

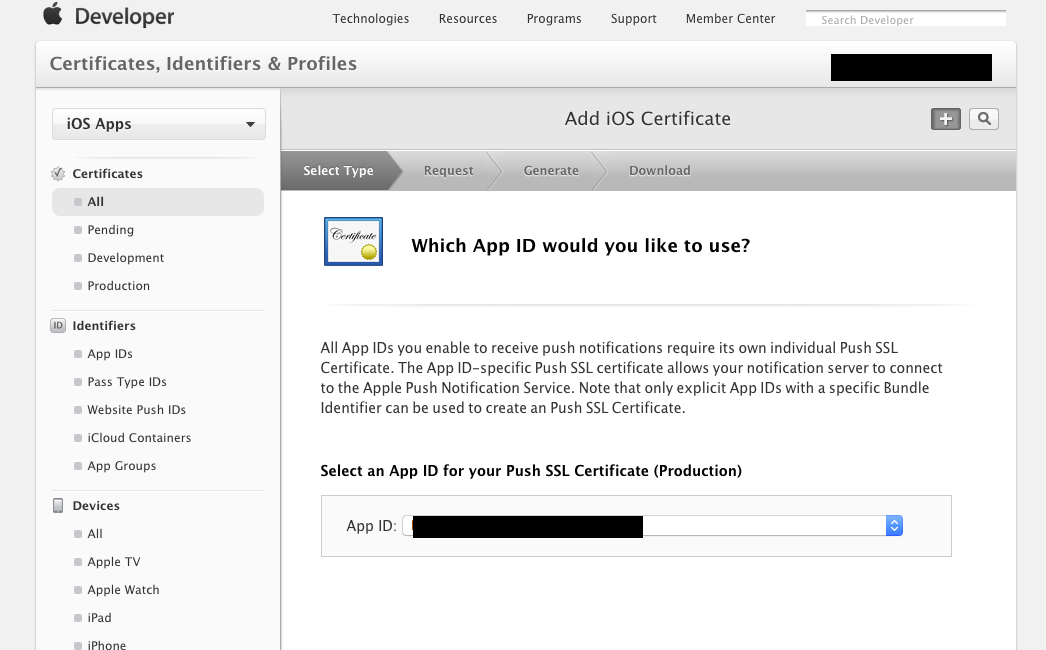
Next, select your app id (the one you created above) and click on Continue.
When you do that the “Add iOS Certificate” wizard screen will appear (shown below).

The first thing it asks for is that you generate a Certificate Signing Request. Since we’ve already done that just tap Continue. In the next step you’ll need to upload the CSR. So just select the CSR file that you generated earlier and click Generate (as shown below).
It’ll take a few seconds to generate the SSL certificate. Click Continue when it’s done. Now click Download to get the certificate – it is named “apns_distribution.cer”. Double click on the .cer file to install the certificate. And that’s it!
As a leading mobile app development company (iPhone, Android, Windows Phone, HTML5 app development), Folio3 specializes in native app development services and cross platform mobile app development services for the iPhone and iPad. We also offer extensive mobile app testing and QA services. If you have a mobile app idea that you’d like to discuss please or would like to know more about our iPhone app development services, please Contact Us. Learn more about our iPhone, Android and Windows Phone app development services.
USA408 365 4638
1301 Shoreway Road, Suite 160,
Belmont, CA 94002
Whether you are a large enterprise looking to augment your teams with experts resources or an SME looking to scale your business or a startup looking to build something.
We are your digital growth partner.
Tel:
+1 408 365 4638
Support:
+1 (408) 512 1812


COMMENTS (0)
Tweet