

In this blog, I will describe how to integrate Cucumber BDD with Selenium step by step and also explain a simple Test Case to Login to the website. In this article, we will cover the basics of Automation testing using Cucumber BDD with Selenium.
What is Cucumber?
Cucumber is a tool that supports Behavior Driven Development (BDD). Using BDD we can define testing steps in a simple English language (Gherkin) which is easily understandable by any non-technical team member or business stakeholders. Cucumber supports different languages like Java, C#, ruby, python etc.
What is Selenium?
Selenium is an automation testing tool (open source) that can execute several functional test cases for web-based applications across multiple browsers. It supports multiple languages like Java, C#, ruby, python etc.
What is BDD?
Behavior Driven Development (BDD) is an approach to write test cases in a human understandable format with the help of Gherkin. BDD not only bridges the gap between analyst and developers but also between Manual QA and Automation Testers (who write BDD).
Example:
Let us understand with this simple example which we will add in the feature file.
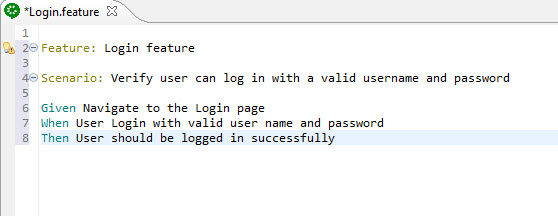
Feature: Login feature.
Scenario: Verify user can log in with a valid username and password.
Given Navigate to the Login page
When User Login with valid user name and password.
Then User should be logged in successfully.
This is the practice where your test cases are written in plain English.
Now let’s understand the purpose of each keyword of Gherkin syntax
Ø Feature: Feature keyword provides a high-level picture of what the software is supposed to do and each feature may have multiple scenarios.
Ø Scenario: Scenario of that feature to test.
Ø Given: Given is basically the initial context before execution or you can say prerequisite as well.
Ø When: When declares an action performed by the system.
Ø Then: Then a keyword is used to see the expected result or outcome.


Why use Cucumber with Selenium?
Ø Cucumber makes it really easy to read and understand the flow of the application.
Ø While Selenium allows you to run your functional test cases on web browsers.
Ø With the combination of Cucumber and Selenium the gap between technical and non-technical team members is removed.
Ø Makes it easier for clients to understand test cases.
Pre-Requisites for Cucumber:
Ø Download and Install Java.
Ø Download and Install Eclipse IDE.
Ø Download Cucumber and Selenium JARs.
Link for downloading: https://www.automationtestinghub.com/download-cucumber-and-selenium-jars/
Ø Add the Cucumber plugin from the marketplace.
Creation of Project using Cucumber with Selenium:
Scenario: Verify user can log in with a valid username and password.
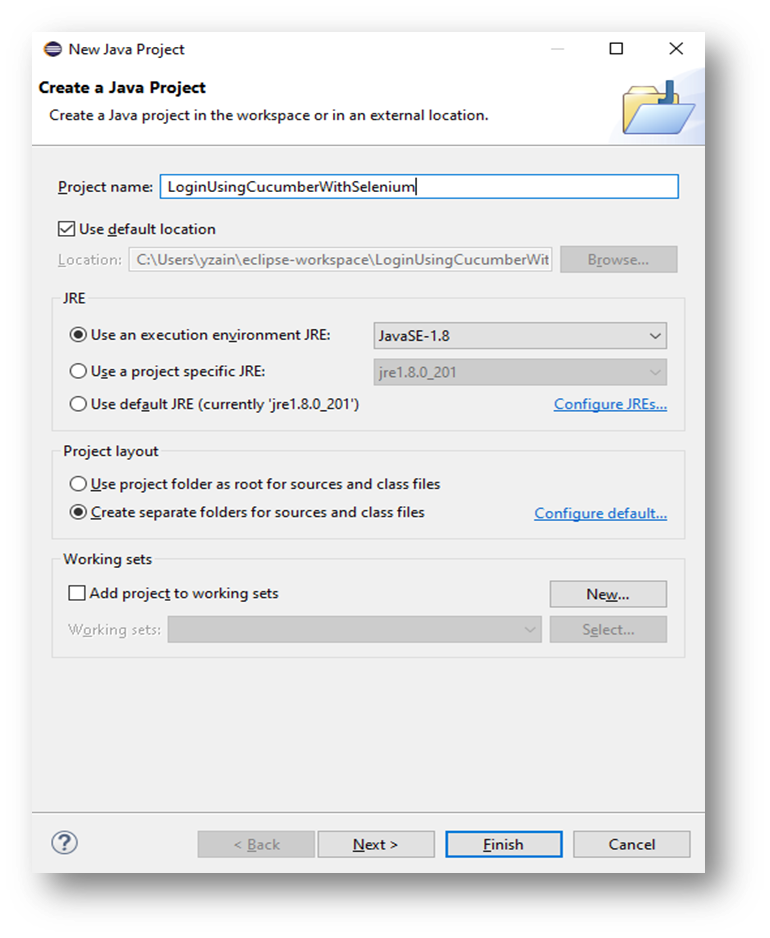
Step1) Create Project in eclipse:
Create Java Project as shown in the screenshot.

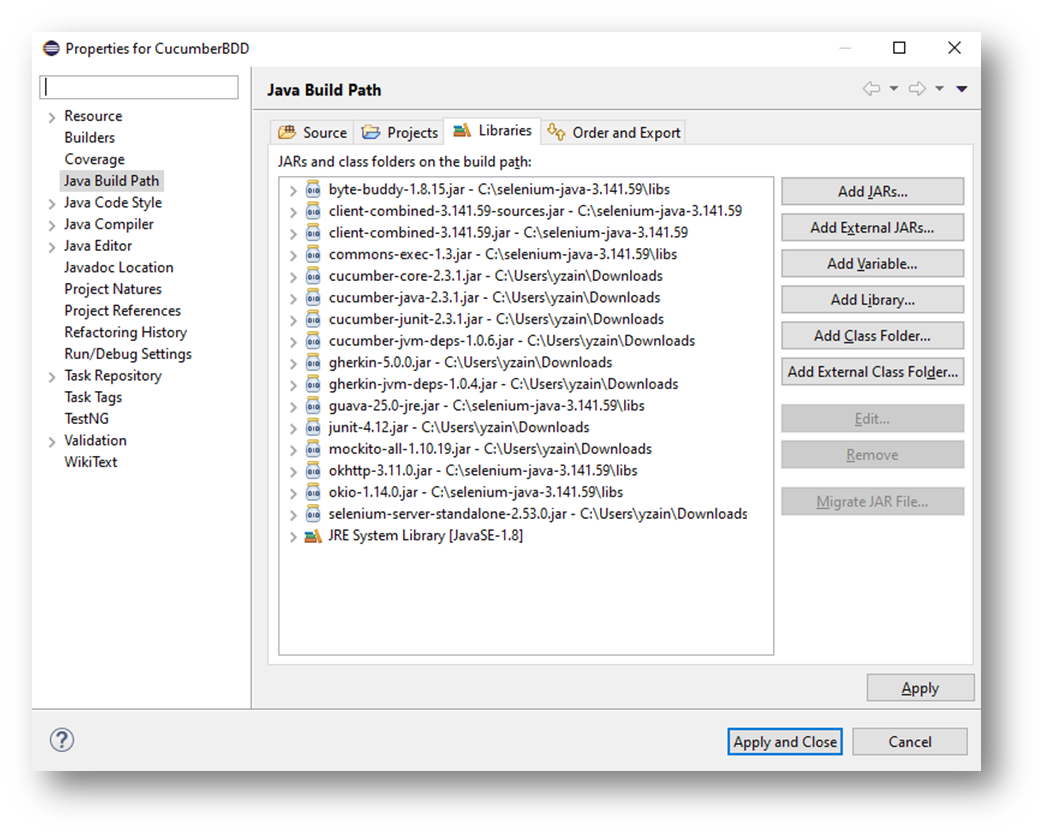
Step2) Adding Jar files in the project:
Right-click on the Project > Properties > Go to Java Build Path. Add all the libraries downloaded earlier as mentioned in Pre-Req.

Step3) Creating Feature file:
Firstly we will create the Feature folder then we will add the feature file with the name Login.feature

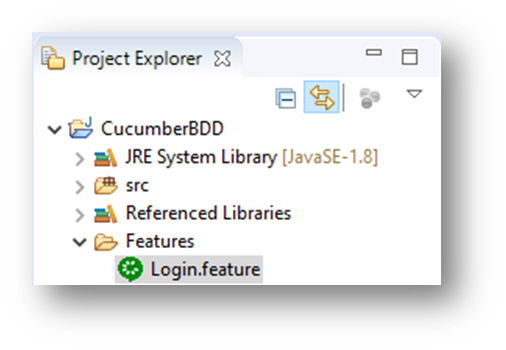
Note: Cucumber Eclipse Plugin must be installed as mentioned in the Pre-Requisite for the feature file to work.
Step4) Add scenario in the Cucumber feature file:
Below mentioned lines are written using Gherkin language in the Login.feature file.

Step5) Create Cucumber Test Runner class:
With the help of the Cucumber Test Runner class, we can run the Cucumber feature file.
We created the “TestRunner” package and then added the “Runner.java” class file under it.


@RunWith annotation tells JUnit to run the class as mentioned with the name “Cucumber.class”. Cucumber is just a class that comes from this library “cucumber.api.junit.Cucumber”.
@CucumberOptions annotation provides the path for our cucumber test like feature file and step definitions. Step Definition class is a java method that is associated with the feature file.
We can define other options as well like Tag, Hooks, DryRun and etc etc.
Step6) Create Step Definition class:
Step Definition is a Java class which is mapped with the feature files (Gherkin language). Step Definition is nothing but the steps you performed under the methods. Against each step of the feature file, you should add a step definition method. That’s how all your feature file steps (Given/When/Then) will have a method linked with it.
Now, when you run the feature file Cucumber would execute the step definition methods associated with the feature file.
We created the StepDefinition package and then added Steps.java class under it.


Step7) Executing the Script:
We can execute the script by right-clicking on TestRunner > Runner.java class and then select Run As > JUnit Test.


Step8) Output of the script.
On successful execution, this is how the output is shown with each step mentioned.


I hope after reading this blog, you will be able to Kick start Selenium with Cucumber BDD.
Thank you.