

We have already discussed in an earlier post what Postman is and how you can achieve Automation & create beautiful web-viewable documentation using Postman. Let’s get started and learn how we can test our APIs by mocking using Postman.
What is Mocking?
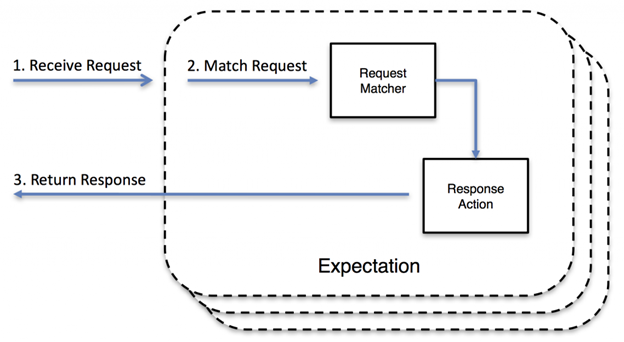
Mocking is one particular technique to allow testing of a unit of code without being reliant upon dependencies. In general, what differentiates mocking from other methods is that mock objects used to replace code dependencies will allow expectations to be set. In Short, Mocking is creating objects that simulate the behavior of real objects.
What is the goal?
Delays on the front or back-end make it difficult for dependent teams to complete their work efficiently. Postman’s mock servers can alleviate those delays in the development process. Developers can view potential responses, without spinning up a back end.
Ergo, rapid development!
Why do we want to do this?
By creating a mock collection in the earlier phases of API development stimulate clear communication among team members and aligns their expectations.
As a result, all teams in the development process can work in parallel and dependent teams experience fewer delays.
What is a Mock Server?
A mock server is just a fake server that is simulated to work as a real server so that we can test our APIs and check the response or errors. Postman lets you create two types of mock servers: private and public.
Private mock servers require users to add a Postman API key in
the request header. x-api-key:<your postman API
key>
Public mock servers are accessible to anyone. When you share a public mock server, users don’t need to add a Postman API key.

How to create a mock server using Postman?
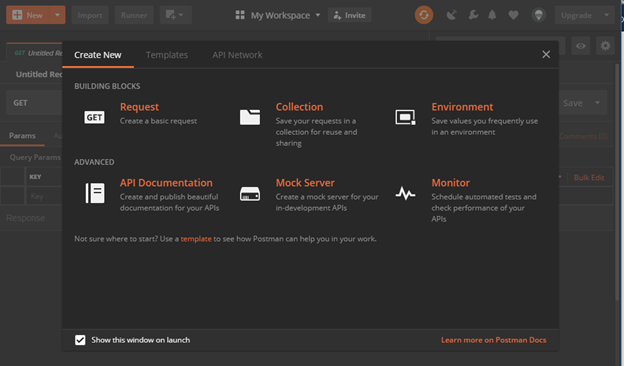
You can create a mock by click on New Button in Header toolbar or when you launch postman you can see an option on launch screen as well.

We will follow the following steps to integrate mock into your existing collection and use Postman Echo service to make sample API calls. :
- Sending a request (R1)
- Saving the request (R1) to a collection (C1)
- Saving the request R1’s response as an example (P1)
- Creating a mock (M1) for the collection (C1)
- Sending a request using the mock server (M1)
- Using query params to match
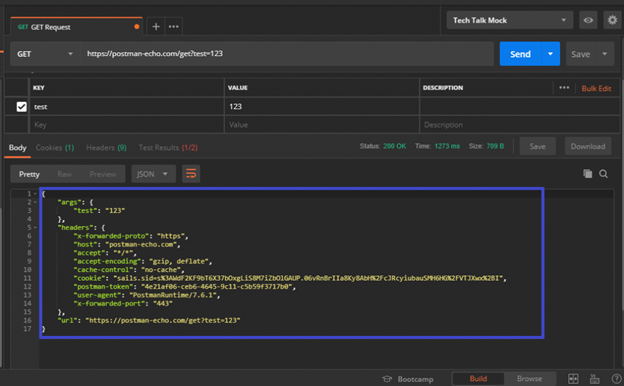
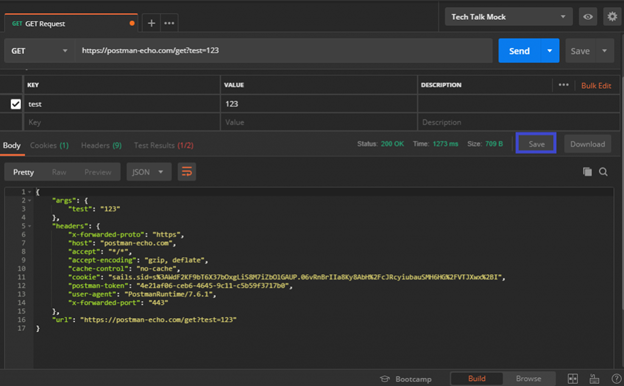
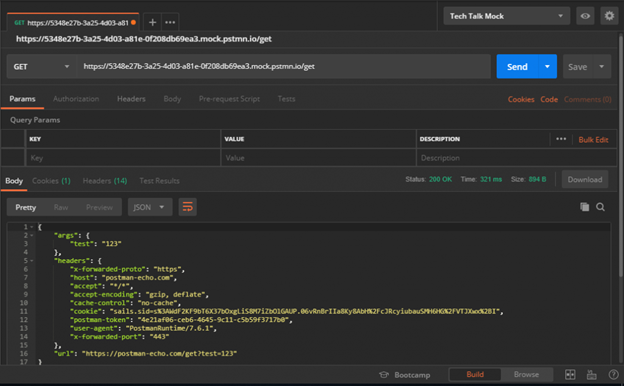
Step 1: Sending a request (R1)
Using the Postman app, send a GET request to the URL https://postman-echo.com/get?test=123. The response can be seen in the image below.

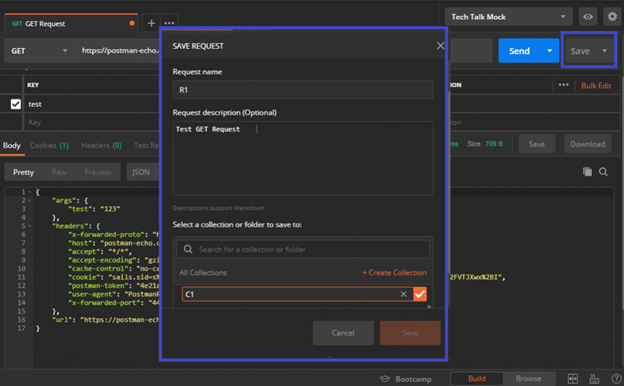
Step 2: Saving the request (R1) to a collection (C1)
Hit the Save button to open the SAVE REQUEST modal. You can save a request to an existing collection, or save it to a new collection. Let’s create our new collection called C1 which will be accessible in the Collections tab.
Step 3: Saving the request R1’s response as an example (P1)
Save an example response from the request R1 by hitting the Save Response button.
This takes us to the Examples screen which can be used to save the request response as an example. Let’s call this example P1.

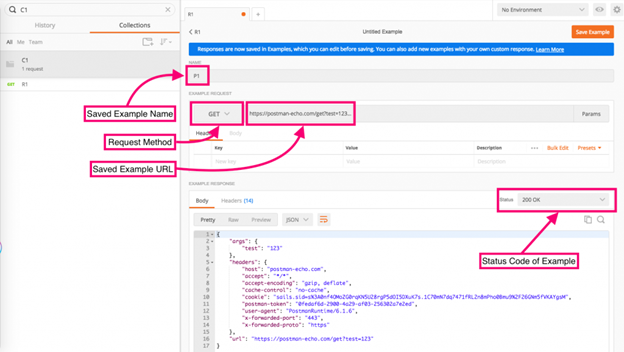
The request method, URL, and status code are crucial in determining which responses will be returned by the mock we will create. Verify these elements are all as desired, and hit the Save Example button. Hit the back arrow in the top left to return to the request builder, and we can now see the example we created in the top right, added to the request.
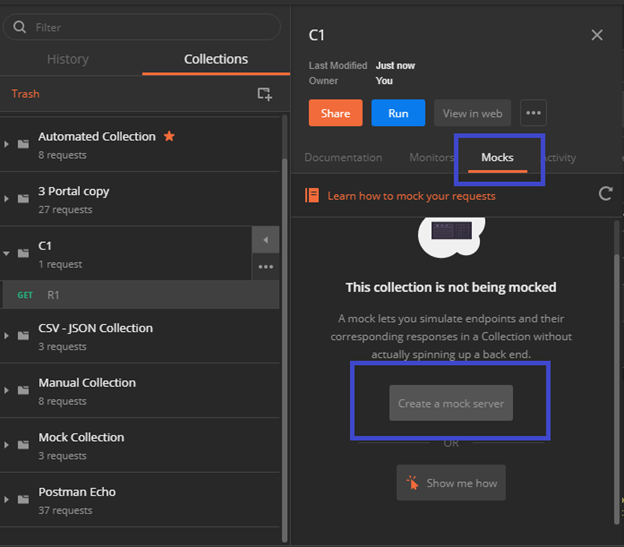
Step 4: Creating a mock (M1) for the collection (C1)
From the Postman app, click on the arrow (▸) next to the collection C1 to expand the details view. Under the Mocks tab, click on Create a Mock server button to open the MOCK COLLECTION modal. Here, you can choose a corresponding environment to include in your mock or select the type of mock server either private or by default public.

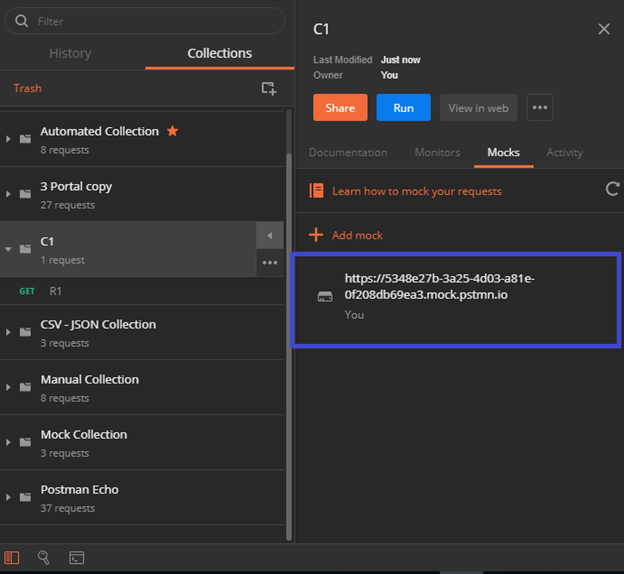
Once you mock the collection, it will be visible under the Mocks tab
of the collection details view. You can also see the mock URL we will need for
the next step.
Step 5: Sending a request using the mock server (M1)
Now that we have created our mock M1, let’s try sending a request to this mock endpoint. Copy the mock URL from the mock we created in the previous step, and paste it into a new request.

Responses returned by the mock service are entirely dependent on your saved examples and the included URL and request method type. We have a saved example with the path /get and the request method GET. So sending a GET request to the/get will return a proper response we are looking for.
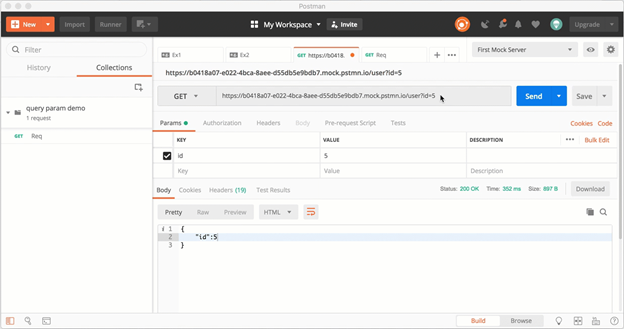
Step 6: Using query params to match
Postman’s Mock server functionality is enhanced to return different responses based on matching request query params. Postman’s Mock server looks at the query params while matching requests to the examples. Which means if you have examples that differ only in query params and want to mock different responses for different query params on the same request path, Postman’s mock server will return the exact response matching that request path and the corresponding query params.
Example as illustrated by Postman Team

And we’re done! We have walked through how to create a collection, save requests, save examples, create a mock, and use a mock.
Postman account gives you a limited number of free mock server calls per month. You can check your usage limits in the Postman API or in the account usage page.