

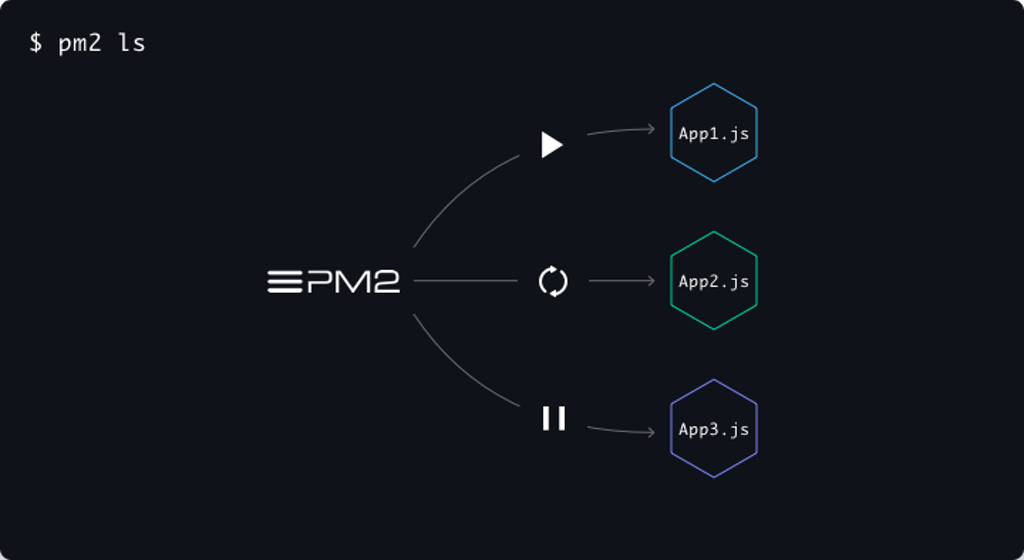
PM2 is a process manager for Node.js, although not limited to it, and it gives us many possibilities to setup a deployment pipeline which later on we can use to automate the deployment process.
In this tutorial, we are going to create the distributed architecture of a Javascript application and deploy it under a few commands.
Basic Requirements:
- Basic Knowledge of JavaScript and its technologies
- Beginner level knowledge of Linux commands and scripting
- Cloud/local hosted server with SSH access. (or any Linux machine to play around with having SSH access, VM etc.)
- Tutorial would be carried out on Linux environment, you can use git-SCM console (https://git-scm.com/) for windows
- The tutorial assumes you have NodeJS (18.04, 16.04) and MongoDB (18.04, 16.04) pre-installed on there remote server.
Tools we are going to use:
- NodeJS 10
- ExpressJS 4
- MongoDB 3.6/4
- PM2
Part 1. Project Setup:
We will have 3 services in our PM2 to keep things simple.
- pm2-auth
- pm2-api
- pm2-mongodb
The architecture of the application can be very complex as well, but it is recommended to move to more reliable infrastructure options, such as containers (docker). But up to mid-level applications, this architecture could be utilized very smoothly.
We will build 2 services namely pm2-api and pm2-auth, the prefix “pm2-” is to identify that our services are related. And we will also have a mongodb provisioning process inside pm2 as well named pm2-mongodb.
Quick start:
If you are going for quick start please skip the following steps and move forward to step#2
If you have a good grasp on creating the services on node js you can skip their creation and jump right to the deployment process, you will have to fork this repository https://github.com/imixtron/pm2-microservices.git. Then go ahead and Clone that repository for a quick start:
$ git clone https://github.com/<your_username>/pm2-microservices.gi
Detailed:
If you are new to JavaScript and Node Scene, i would recommend this Beginner level tutorial that will get you started.
Lets start by creating a folder where our codebase is going to be
$ mkdir pm2-microservices
$ cd pm2-microservices
Now, we will be creating separate folders for each service having prefix ‘pm2-’, with the following folder structure, so go ahead and create the files and folders.
•
├── pm2-api
│   ├── .env
│   ├── index.js
│   └── package.json
│
├── pm2-auth
│   ├── .env
│   ├── index.js
│   └── package.json
│
└── pm2-mongodb
    ├── .gitkeep
We will leave pm2-mongodb folder empty as it will contain our data files, we can also later on mount this to a persistent storage, so it is independent of our application server or completely change the location as we require. Since the projects are similar, we will go ahead and populate the package.json with following content:
// pm2-api/package.json
{
  "name": "pm2-api",
  "version": "1.0.0",
  "main": "index.js",
  "scripts": {
    "build": "npm install && npm start",
    "start": "node index.js",
  },
  "dependencies": {
    "body-parser": "^1.19.0",
    "dotenv": "^8.0.0",
    "express": "^4.17.0",
    "mongoose": "^5.5.11"
  }
}
// pm2-auth/package.json
{
  "name": "pm2-auth",
  "version": "1.0.0",
  "main": "index.js",
  "scripts": {
    "build": "npm install && npm start",
    "start": "node index.js",
  },
  "dependencies": {
    "body-parser": "^1.19.0",
    "dotenv": "^8.0.0",
    "express": "^4.17.0",
    "mongoose": "^5.5.11"
  }
}
Now that we have our dependencies in order, we can go ahead and hit npm install in our main folders pm2-api and pm2-auth. Our .env file will be similar having common contents with a tiny change of PORT, for pm2-api we will be using 9999 whereas for pm2-auth we will be using port4000.
.env
PORT = 9999
# global environment
MONGO_URI = 'mongodb://localhost:27017'
MONGO_DB_NAME = 'serviceDB'
pm2-api (index.js)
const dotenv      = require('dotenv').config();
const express     = require('express');
const app         = express();
const bodyParser  = require('body-parser');
const mongoose    = require('mongoose');
const Schema      = mongoose.Schema;
const mongoUri    = process.env.MONGO_URI;
const mongoDbName = process.env.MONGO_DB_NAME;
// connect to mongoose instance (default config)
mongoose.connect(`${mongoUri}/${mongoDbName}`, { useNewUrlParser: true });
// user model
const userSchema = new Schema({
  name: String,
  email: String,
  password: String
});
const User = mongoose.model('users', userSchema);
// configuring bodyParser for POST data
app.use(bodyParser.urlencoded({ extended: true }));
app.use(bodyParser.json());
const port = process.env.PORT || 9999;
// API Routes
const router = express.Router();
router.post('/user', (req, res) => {
  const userData = req.body;
  const user = new User(userData);
  user.save((error) => {
    if (!!error)
      return res.status(500).send({error: error});
    return res.status(500).send({
      message: 'user created successfully'
    });
  });
});
app.use('/api', router);
app.listen(port);
console.log(`port ${port}`);
pm2-auth (index.js)
const dotenv      = require('dotenv').config();
const express     = require('express');
const app         = express();
const bodyParser  = require('body-parser');
const mongoose    = require('mongoose');
const Schema      = mongoose.Schema;
const mongoUri    = process.env.MONGO_URI;
const mongoDbName = process.env.MONGO_DB_NAME;
// connect to mongoose instance (default config)
mongoose.connect(`${mongoUri}/${mongoDbName}`, { useNewUrlParser: true });
// user model
const userSchema = new Schema({
  name: String,
  email: String,
  password: String
});
const User = mongoose.model('users', userSchema);
// configuring bodyParser for POST data
app.use(bodyParser.urlencoded({ extended: true }));
app.use(bodyParser.json());
const port = process.env.PORT || 4000;
// API Routes
const router = express.Router();
router.post('/login', (req, res) => {
  const {email, password} = req.body;
  User.findOne({ email: email}, (error, user) => {
    if (error)
      return res.status(500).send({
        error: true,
        message: 'Invalid credentials'
      });
    if (user.password === password)
      return res.status(200).send({
        token: Buffer.from(user.password).toString('base64'),
        ...user.toObject()
      });
    return res.status(200).send({
      message: 'Invalid Credentials'
    });
  });
});
app.use('/auth', router);
app.listen(port);
console.log(`port ${port}`);
As you can clearly see, to keep the tutorial simple, both of our services are exactly similar except for the endpoint functionality. We can have multiple services that work independently from each other.
Do note that we are using dotenv to parse .env file for local development. When we deploy this to server naturally we will have our own environment variables set via pm2 for each process.
pm2-mongodb
We are going to leave this folder empty for now, and create an empty file .gitkeep
Part 2. PM2 Ecosystem setup:
Now, over to the deployment magic, we are going to create a process file containing the execution of our applications. In order to do so, in the main folder ( pm2-microservices ), run the following command to init an ecosystem file.
$ pm2 ecosystem
A file, ecosystem.config.js with following content should be generated by pm2, having more content then below (showing less content):
module.exports = {
  apps : [{...}],
  deploy : {
    production : {...}
  }
};
Lets discuss the applications first, the json will contain the configuration of our process that will be running our respective application. Consider pm2-api as an example, pm2-auth will be exactly similar:
{
  cwd: 'pm2-api',
  name: 'pm2-api',
  script: 'npm',
  args: 'run build',
  restartDelay: 1000,
  instances: 1,
  autorestart: true,
  watch: false,
  max_memory_restart: '200M',
  env: {
    SERVICE_NAME: 'pm2-api',
    PORT: 9999,
    NODE_ENV: 'development'
  },
  env_production: {
    SERVICE_NAME: 'pm2-api',
    PORT: 9999,
    NODE_ENV: 'production'
  }
}
Some important attributes to note are cwd , script , args .
cwd
is the current working directory which will determine the file location
from our main file, it is recommended to keep it same as the project
folder unless you know what you’re doing.
script
can be the bash file or a command that we’re executing, in our case we
are using npm run-script to start our server when it runs from our
ecosystem.
args are there to supply arguments to our script. So, for instance we have to run the command npm run build which will install dependencies and the start the server. so we would split npm and place it in our script attribute, and run build in our args attribute.
You can find further details about the attributes in the main documentation.
And for pm2-mongodb we will only have our process execute a bash command, monogod --dbpath pm2-mongodb (given that mongodb is already installed on our server and present in our path variables).
Compiling everything we will have the following structure, copy this inside of your ecosystem.config.js
// global environment
const commonEnv = {
  dev: {
    MONGO_URI: 'mongodb://localhost:27017',
    MONGO_DB_NAME: 'serviceDB'
  },
  prod: {
    MONGO_URI: 'mongodb://localhost:27017',
    MONGO_DB_NAME: 'serviceDB'
  }
}
module.exports = {
  apps: [{
    cwd: 'pm2-api',
    name: 'pm2-api',
    script: 'npm',
    args: 'run build',
    restartDelay: 1000,
    instances: 1,
    autorestart: true,
    watch: false,
    max_memory_restart: '200M',
    env: {
      ...commonEnv.dev,
      SERVICE_NAME: 'pm2-api',
      PORT: 9999,
      NODE_ENV: 'development'
    },
    env_production: {
      ...commonEnv.prod,
      SERVICE_NAME: 'pm2-api',
      PORT: 9999,
      NODE_ENV: 'production'
    }
  },
  {
    cwd: 'pm2-auth',
    name: 'pm2-auth',
    script: 'npm',
    args: 'run build',
    restartDelay: 1000,
    instances: 1,
    autorestart: true,
    watch: false,
    max_memory_restart: '200M',
    env: {
      ...commonEnv.dev,
       SERVICE_NAME: 'pm2-auth',
      PORT: 4000,
      NODE_ENV: 'development'
    },
    env_production: {
      ...commonEnv.prod,
      SERVICE_NAME: 'pm2-auth',
      PORT: 4000,
      NODE_ENV: 'production'
    }
  },
  {
    name: 'pm2-mongodb',
    script: 'mongod',
    args: '--dbpath pm2-mongodb',
    instances: 1,
    autorestart: true,
    watch: false
  }]
};
As you can see we have a variable
commonEnvwhich has the common environment variables shared between apps, in our case MongoDB Uri string.
Now that we have our process file in order, hit the following command to check if everything is working:
$ pm2 start ecosystem.config.js
If everything is in order we are going to commit this change and push it to our repository
$ git add ecosystem.config.js
$ git commit -a -m "add ecosystem file for pm2"
$ git push
Part 3. Deployment:
Server Setup:
For ease, lets consider the server’s hostname to be pm2-microservices, you can replace it with the ip and the we are going to use root as our user. It is not recommended to use root for deployments.
All the major cloud providers offer a limited amount of resources for free, which will be enough to get going with this tutorial. You can use any, I personally prefer Digital Ocean and for this tutorial i have a $5 Droplet up and running. You can use my referral link to get $10 in credit when you signup.
For server setup, you can follow this Digital Ocean tutorial which will guide u to setup a ssh keys on the server and your GitHub account for a smooth and hassle free deployment.
Firstly we are going to generate a SSH key and copy it over to our server. If you already have a SSH key that you use, ignore this bit. If you don’t then go ahead and run the following command in your bash terminal: (enter email in <email>)
$ ssh-keygen -t rsa -b 4096 -C "<email>"
Assuming you have the server ready to go, run the following command to copy your public key onto the server:
$ ssh-copy-id -i ~/.ssh/id_rsa.pub <username>@<ip_address>
After this is done we will also need to generate SSH key on our server which we will copy on our GitHub account so it is recognized when our server pulls the repository onto the server. Here, let the email be same as our Github account so their are no conflicts.
$ ssh root@<hostname>
...
root@pm2-microservices:~# ssh-keygen -t rsa -b 4096 -C "<email>"
Generating public/private rsa key pair.
Enter file in which to save the key (/root/.ssh/id_rsa):
Enter passphrase (empty for no passphrase):
Enter same passphrase again:
Your identification has been saved in /root/.ssh/id_rsa.
Your public key has been saved in /root/.ssh/id_rsa.pub.
The key fingerprint is:
SHA256:f+Z2fzSC/Y4BD+1xHXtvpAzKGvtHA7a5ErMFXLS6wUQ <email>
The key's randomart image is:
+---[RSA 4096]----+
|        E..      |
|       .  ..     |
|       ....    . |
|       oo.o .   +|
|        So *+o o+|
|        o=+oB=o++|
|        o=+oo==.+|
|        o+.+o +o.|
|        oo.o.o.oo|
+----[SHA256]-----+
root@pm2-microservices:~# cat ~/.ssh/id_rsa.pub
ssh-rsa AAAAB3AAADAQABAAACAQCqOPsoWFJkNwahquJx6mr/H0TPEBqcaZKqGkB7wIHTB2gvJ36aZhfTFg5dSfknluMZa6nt1KOSVIhCBciEaRvObLxI2NwRYdtYP3zEl3SjwCNg1G0gFUJ8+uIobD2AIM1g9WURMRDDmuPZTakyyPsu5qqS2TvoezzzsJUBu/1Ul3grZ8am0SAeJYGjm1l/ajgRdlemn3m/GQMJTxMyR0Q/yPrvXmC/Z3jhs24km9n9b+/2gXmzeQdXpxYyl/R7iM52cZNC7cFukYcZL8Zw6JZ5fs9zv0mxOK4uQEeIrUldxAezaD9IsFWtYtVr9QpjxTRnZRJ7CrsBSnZttQgVig0FjlDkYSFmkfeQkfJe9BvrYYi3VO1piaAdRjlxTwud74GZK3vwz9TIN7MbF7kVOvxnwXW19n6ZJe9xsnrDBRaFHvjjd6tXTUn4p0fz1BIuHQPGPFOvW/I+/IKAtNBpxAumGZ6JMAvYBwacP8sKalROzmSe2Z8BQt8nJKBDeLHJbDPAQn4ghyqcsR0s0UH+NV3Oci1h3JkMV9310VSdytpjRQKOl98uniaOZWXINzaC1yc2EABdHBsdKh7cMSBbM1BDb5dcwuy76OJn/SXQy8VY39a6AqHMS19IjHDhr1zzNuhLI9HrxIooBOtof9egthyU5gRBLi8rUNauD5Bgfscp+ZT+Dufdbxew== <email>
root@pm2-microservices:~#
By now the certificate and server would have been deleted, the shell output is just to give you guys the idea of how it’s going to look. You will have all that information unique to ur system when u generate it.
When u have your SSH public key on the console, as seen above, carefully copy it. On Github navigate to Settings > SSH and GPG keys and click on New SSH key. You should have the following screen in front of you:
Also, do note that you will be generating the SSH key on your server (not on local machine) that would be set inside the Github account

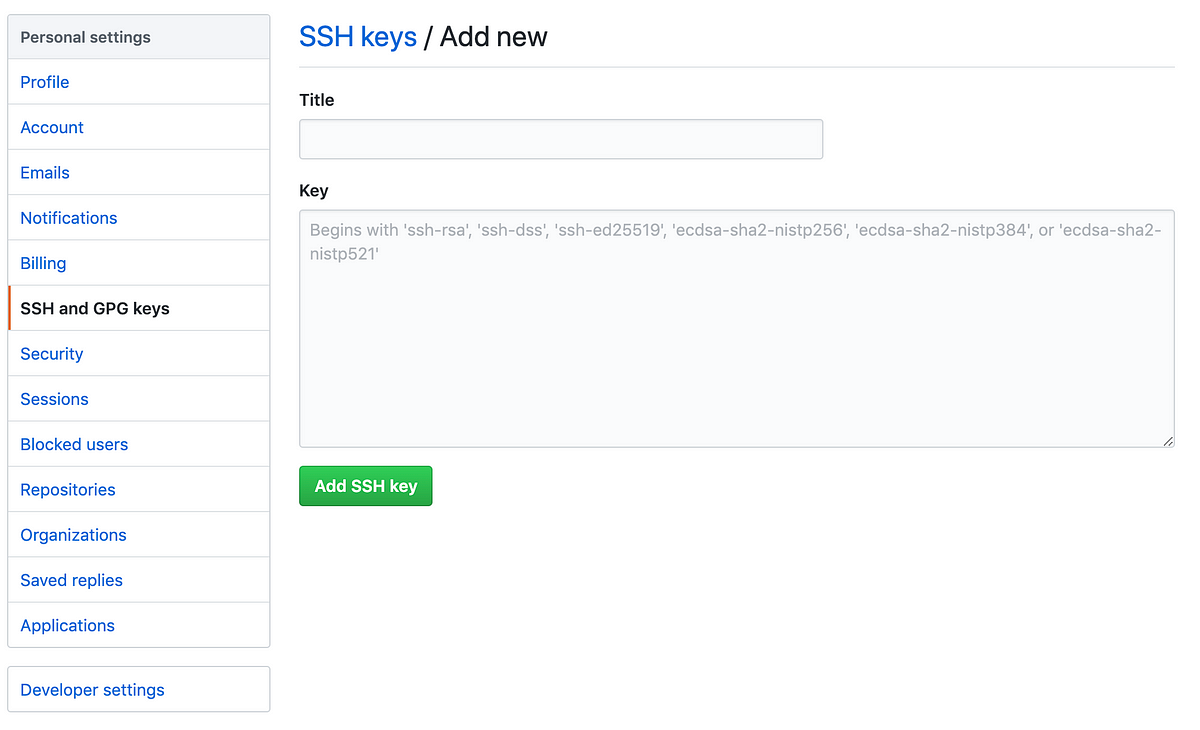
Give a title to your key so you can recognize the it later on and inside the Key textbox paste the key that we copied earlier from the console.
While you are connected to the server, you should also add Github.com to your known hosts so when pm2 is deploying it wont have any problem pulling the repo from Github.
root@pm2-microservices:~# ssh-keyscan -H github.com >> ~/.ssh/known_hosts
Deployment details in Ecosystem file:
Now, that it’s done, we can securely connect to our server & repository without worrying about passwords. It is necessary to do so since deploying on the server is only supported via SSH key. We will add the only thing that is missing in our ecosystem.config.js, the deployment instructions. We will be adding the following content to the module.exports
...
module.exports = {
  apps: [...],
  deploy: {
    development: {
      user: 'root',
      host: '<remote host ip>',
      ref: 'origin/master', // branch to be deployed could be diff
      ssh_options: "StrictHostKeyChecking=no",
      repo: 'git@github.com:<github_user>/pm2-microservices.git',
      path: '/opt/pm2-microservices/production',
      'pre-setup': 'npm install -g pm2',
      'post-deploy': 'npm install && pm2 reload ecosystem.config.js --env development'
    }
  }
}
Finally our ecosystem.config.js would look something like this:
// ecosystem.config.js
// global environment
const commonEnv = {
  dev: {
    MONGO_URI: 'mongodb://localhost:27017',
    MONGO_DB_NAME: 'serviceDB'
  },
  prod: {
    MONGO_URI: 'mongodb://localhost:27017',
    MONGO_DB_NAME: 'serviceDB'
  }
}
module.exports = {
  apps: [
    {
      cwd: 'pm2-api',
      name: 'pm2-api',
      script: 'index.js',
      restartDelay: 1000,
      instances: 1,
      autorestart: true,
      watch: false,
      max_memory_restart: '200M',
      env: {
        ...commonEnv.dev,
        SERVICE_NAME: 'pm2-api',
        PORT: 9999,
        NODE_ENV: 'development'
      },
      env_production: {
        ...commonEnv.prod,
        SERVICE_NAME: 'pm2-api',
        PORT: 9999,
        NODE_ENV: 'production'
      }
    },
    {
      cwd: 'pm2-auth',
      name: 'pm2-auth',
      script: 'index.js',
      restartDelay: 1000,
      instances: 1,
      autorestart: true,
      watch: false,
      max_memory_restart: '200M',
      env: {
        ...commonEnv.dev,
        SERVICE_NAME: 'pm2-auth',
        PORT: 4000,
        NODE_ENV: 'development'
      },
      env_production: {
        ...commonEnv.prod,
        SERVICE_NAME: 'pm2-auth',
        PORT: 4000,
        NODE_ENV: 'production'
      }
    },
    {
       name: 'pm2-mongodb',
       script: 'mongod',
       args: '--dbpath pm2-mongodb',
       instances: 1,
       autorestart: true,
       watch: false,
    }],
  deploy: {
    development: {
      user: 'root',
      host: '<hostname>',
      ref: 'origin/master',
      ssh_options: "StrictHostKeyChecking=no",
      repo: 'git@github.com:<github_user>/pm2-microservices.git',
      path: '/opt/pm2-microservices/production',
      'pre-setup': 'npm install pm2',
      'post-deploy': 'npm install && pm2 reload ecosystem.config.js --env production'
    }
  }
};
Finally, we are 2 steps away from deploying our application. First we need to setup the environment over to the server, since we have configured all the certificates and we have proper access from our local to server to Github, we are good to go. On our local project workspace, run:
$ pm2 deploy development setup
--> Deploying to development environment
--> on host /////hostip/////
  ○ executing pre-setup `npm install pm2`
...
○ running setup
  ○ cloning git@github.com:imixtron/pm2-microservices.git
  ○ full fetch
Cloning into '/opt/pm2-microservices/production/source'...
Warning: Permanently added the RSA host key for IP address '13.229.188.59' to the list of known hosts.
  ○ hook post-setup
  ○ setup complete
--> Success
$ pm2 deploy development --force
--> Deploying to development environment
--> on host /////hostip/////
  ○ deploying origin/complete
  ○ executing pre-deploy-local
  ○ hook pre-deploy
  ○ fast forward complete
Your branch is up to date with 'origin/complete'.
Already on 'complete'
From github.com:imixtron/pm2-microservices
 * branch            complete   -> FETCH_HEAD
Already up to date.
  ○ executing post-deploy `npm install && pm2 reload ecosystem.config.js --env production`
npm WARN saveError ENOENT: no such file or directory, open '/opt/pm2-microservices/production/source/package.json'
npm WARN enoent ENOENT: no such file or directory, open '/opt/pm2-microservices/production/source/package.json'
npm WARN source No description
npm WARN source No repository field.
npm WARN source No README data
npm WARN source No license field.
up to date in 0.586s
found 0 vulnerabilities
[PM2] Spawning PM2 daemon with pm2_home=/root/.pm2
[PM2] PM2 Successfully daemonized
[PM2][WARN] Applications pm2-api, pm2-auth, pm2-mongodb not running, starting...
[PM2] App [pm2-api] launched (1 instances)
[PM2][WARN] Environment [production] is not defined in process file
[PM2] App [pm2-auth] launched (1 instances)
[PM2] App [pm2-mongodb] launched (1 instances)
  ○ hook test
  ○ successfully deployed origin/complete
--> Success
And that’s about it, you have deployed all of your code base onto the server. The build-up to this point took a while like Game of Thrones did, but the ending to this one is far more satisfying :). Next time you have to do a deployment, you will be needing to push your changes to the server and run a single command and no one needs to die:
$ pm2 deploy development update
# Pushed Bad Code? Revert in a single command
$pm2 deploy production revert 1
Testing Routes:
Use the following endpoints to test the routes, curl commands are attached for ease.
- Create User
ENDPOINT
  POST <hostname>:9999/api/user
PAYLOAD
  {
    "name": "user1",
    "email": "user1@gmail.com",
    "password": "password123"
  }
# curl
curl -X POST -H "Content-type: application/json" -d '{ "name": "user1", "email": "user1@gmail.com", "password": "password123" }' '<hostname>:9999/api/user'
- Login
ENDPOINT
  POST <hostname>:4000/auth/login
PAYLOAD
  {
    "email": "user1@gmail.com",
    "password": "password123"
  }
# curl
curl -X POST -H "Content-type: application/json" -d '{ "email": "user1@gmail.com", "password": "password123" }' '<hostname>:4000/auth/login'
Conclusion:
And that’s a wrap, for small to mid-level architecture i believe PM2 can sustain good amount of load, given we are properly managing the resources. We can further have multiple processes running our servers.
Furthermore, with this architecture we can easily move to docker environment by creating dockerfile for each service and using kubernetes to orchestrate our deployment and scaling.