


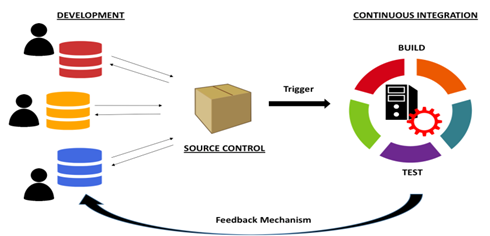
Continuous integration (CI): is the Process of automating the code of all developers from multiple working copies into a single software project.
Whenever a developer makes a code commit, the software tests the build automatically. For large scalable projects, developers are committing code very frequently, within a day. With each commit, the code is built and tested. If the test is passed, the build is good to go for deployment. This commit, build, test, and deploy is a continuous process and hence the name continuous integration.

Jenkins – What is this?
It is an open-source Continuous Integration server capable of orchestrating a chain of actions that help to achieve the Continuous Integration process in an automated fashion.
Let’s get started.
Step 1: Create a test Script on IntelliJ
We are using Java as the language and IntelliJ for an IDE. You can use Eclipse as well. We have created a Maven project in which we only have created one test script just for this blog. Once you’re done with the test script do not forget to execute it once.

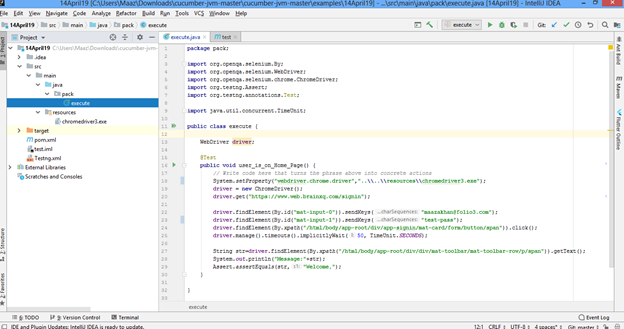
Note: If you do not have knowledge of test automation you first need to get it done before jumping in.
Step 2: Create a New Repo on Git
Create your account on GitHub and log in. When you log in, you will see an Add New option to create a new repository. Provide a Repo name and select Private or Public for your repo status.


After creating the repo, you will be redirected to it. Copy browser URL this URL is used in Jenkins and IntelliJ when you push your code.
Step 3: Push code on Git Repo
You first have to configure Git on IntelliJ. Follow these steps:
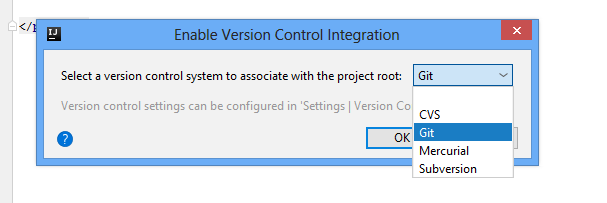
In IntelliJ, go inside VCS and select Enable Version Control Integration.


After this select Git from dropdown.

Now, Go inside VSC and select Commit. A pop up will appear asking you to select a project to commit.

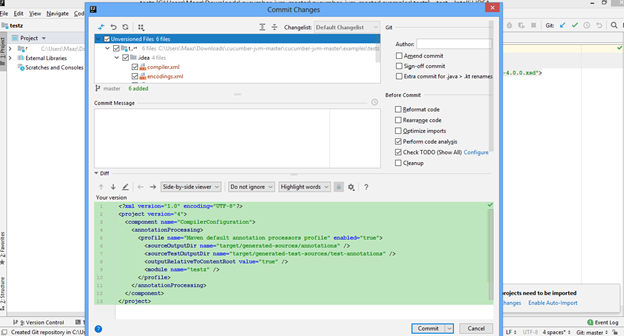
When you click on Commit button all your project code is pushed toGit.
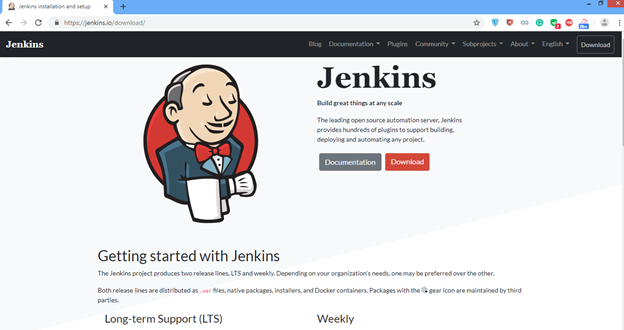
Step 4: Download Jenkins
Hit URL:” https://jenkins.io/” onto Browser and Select Download button.

It will show you 2 options for downloading Jenkins, first is the weekly release and the second one is the Long Term Release(LTR). Download LTS as it is supposed to be stable. Therefore, select windows option and Jenkin zip file get downloaded into your system.

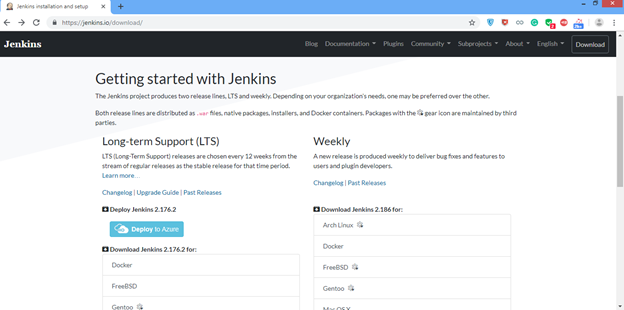
Copy zip file and place that anywhere in your system.
Step 5: Install Jenkins
Follow these steps to install Jenkins through command prompt.
1. Open Command Prompt.
2. Go inside Jenkins folder.
3. Type command: Java -jar Jenkins.war

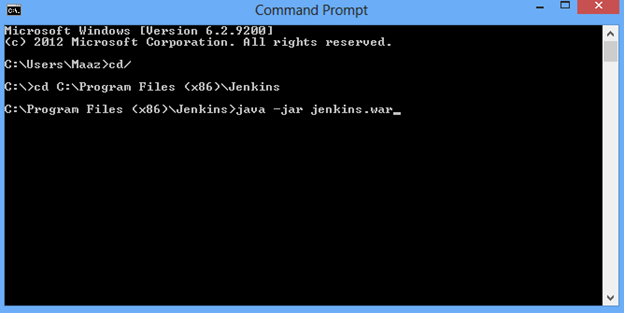
Click enter, it will take a couple of mins to install. Then you are all set to login into Jenkins.
Step 6: Login into Jenkins
Hit URL:” http://localhost:8080” to start Jenkins, it will redirect it to a login page that requires a username and password. Username is “admin” whereas the password can be used from:
C:\Program Files (x86)\Jenkins\secrets\ initialAdminPassword.txt file

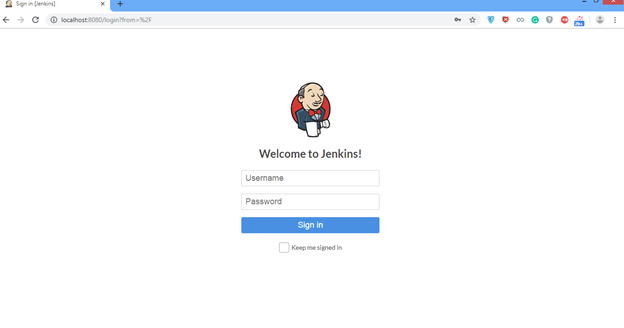
Enter username and password then click on the Sign in button. As you are logging in for the first time, it will ask you to install some plugins.

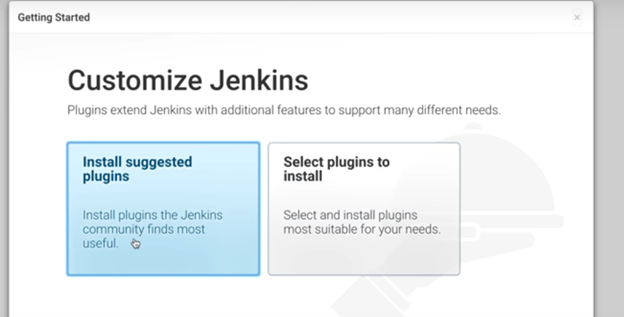
Click on “Select plugins to install” then you will be re-directed onto a list of plugins. There are some plugins that already mark for installation.
Note: You can install more plugins after setup completion.
Step 7: Started with Jenkins – Setup Job and Manually execute
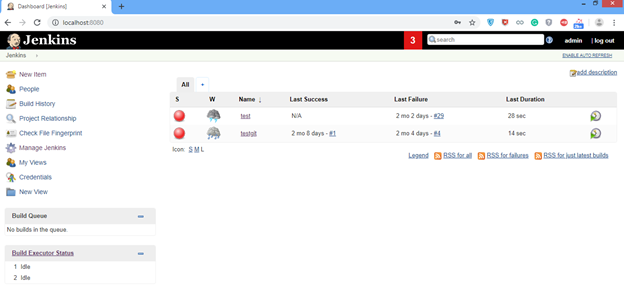
Now Jenkins is finally started and you can see its Home screen in below screenshot.

Let’s get started and set up a task. Click on New Item. It will ask the Name and type of project that you want to create.

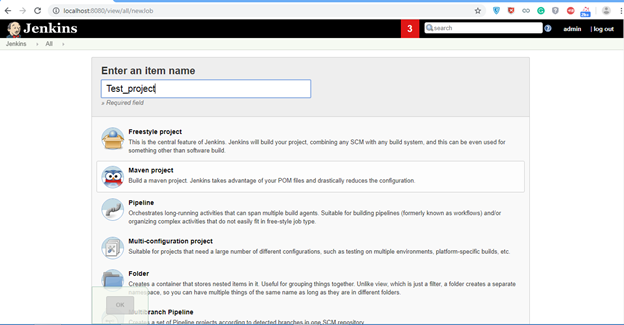
Here, I am selecting a Maven Project as I had created a test script in Maven Project inside Intellij and click OK.
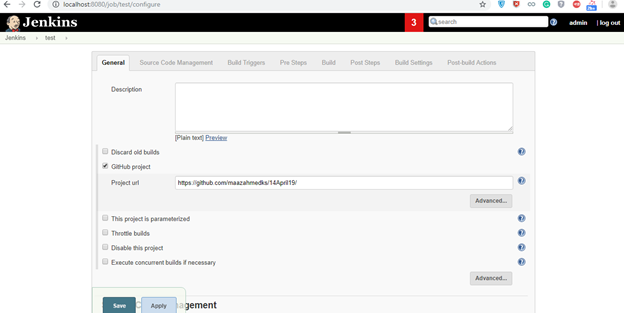
Placing your test scripts on GitHub is always a good approach. I have placed my scripts onto Git.


Back to Jenkins, I mark tick onto GitHub Project checkbox and provide my Git URL in the input box.
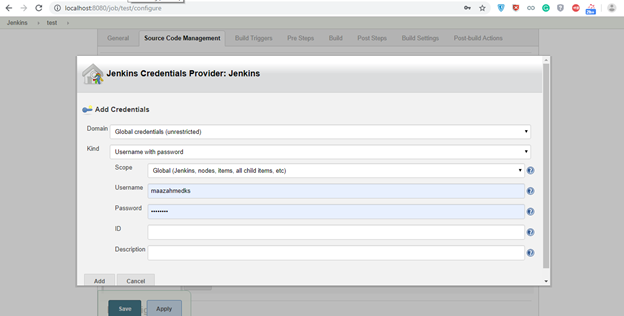
On Scroll down to a page, you will see a section of Source Code Management. Select Git checkbox then you need to provide Git Repository URL and Credentials.

How to Add Credentials? Click on the Add button for credentials and provide Username and password then click the Add button to submit.

After you are done with these steps scroll down the page. Now, you need to come inside the Build section and write pom.xml inside Root POM and inside Goals and Options write command: “clean deploy”.

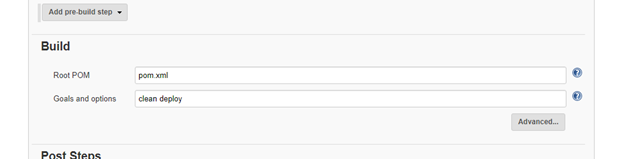
Why pom.xml ? pom.xml is a file that runs all your test scripts defined under it. You do not explicitly need to run each test script you can define all scripts into this file and execute it.
Clean Deploy – What is this ?
· clean: removes files generated at build-time in a project’s directory (target by default)
· deploy: copies the final package to the remote repository for sharing with other developers and projects.
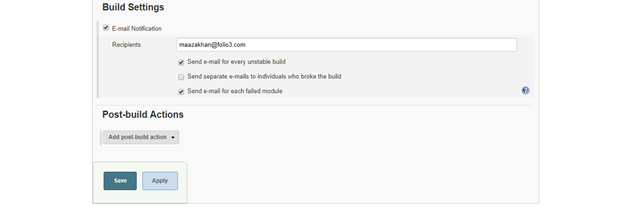
Scroll down for some more configuration, you can also configure email Notification that is used when your executed job fails against test script then you will be notified through email notification.
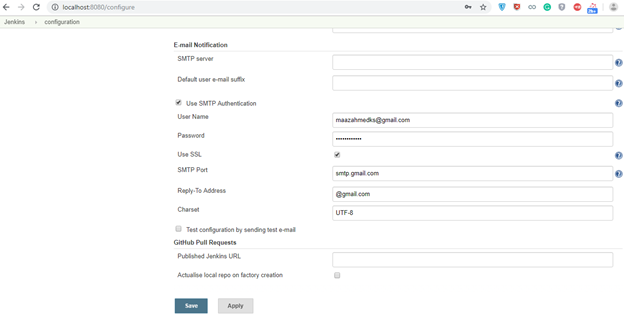
Before continuing on this, you first need to email configuration inside Jenkins. Therefore, Click on Manage Jenkins from Home Screen and select Configure System. When scrolling down the page, you will observe Email Notification tab that required some details.
- · SMTP server: smtp.gmail.com
- · Default user e-mail suffix: @gmail.com
- · Click on the Advanced button and mark tick on “Use SMTP Authentication”.
- · Provide your Gmail account credentials.
- · Mark SSL as a tick.
- · SMTP Port: 465

Just to test these configurations working fine or not. Mark tick on the checkbox of “Test configuration by sending test e-mail” and provide an email address.

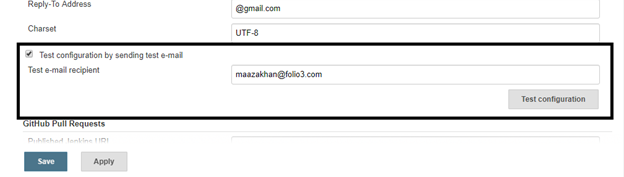
Click on Test Configuration button then a confirmation message will be shown regarding email is sent successfully. Click on Save button.
Go back to your project and provide a Recipient email address.

The good thing is you have now configured all the required setup. Click on Save Button to proceed further. Once you saved your project will start appearing in the list.


To test everything is working fine, Manually execute your project right click on the project name and click on the Build Now option.

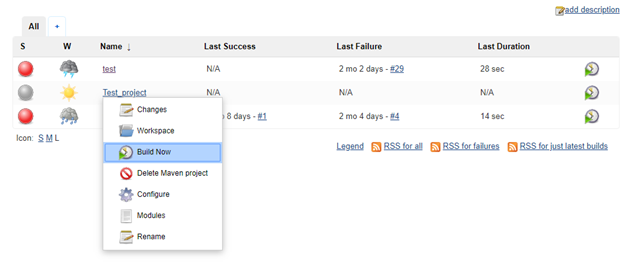
You can have a look at the result of this execution by going inside the project and Build History.

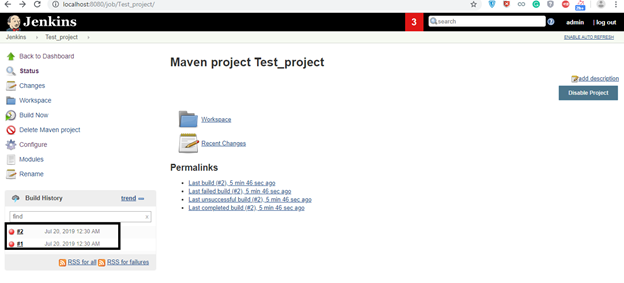
Click on the latest one you can have a look at execution logs. As we have configured Email
Notification to be triggered on execution failure. Like here our latest execution is failed. Therefore, we have received an email.
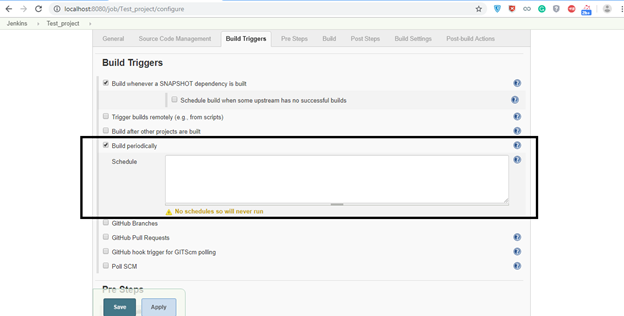
Step 8: Setup a Scheduler for Build execution
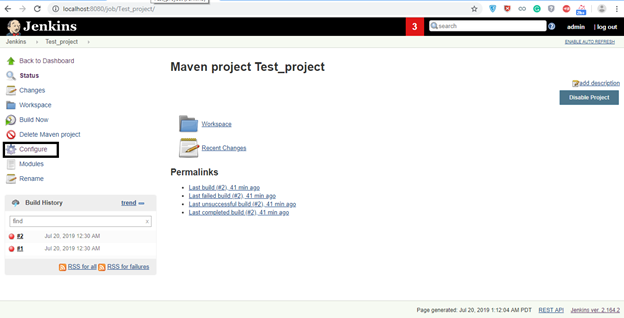
Jenkins allows admin to set a Scheduler that automatically a job on a time set under Scheduler. Time may be set of a running job after every 3 hours, 6 hours, 12 hours, once in a day, etc. Let set a Scheduler in our job. Click on our job from Jenkins home screen and select configure appearing on the left side.
Scrolling down the page, you can see Section:“Build Trigger” having check-box Build Trigger Periodically. Mark that checkbox as a tick. Here you can specify the time in which you want to execute your job.
You need to provide time in a specific format. Sample format can be viewed from a question mark. Click on question mark icon, a detail sample format start appearing.

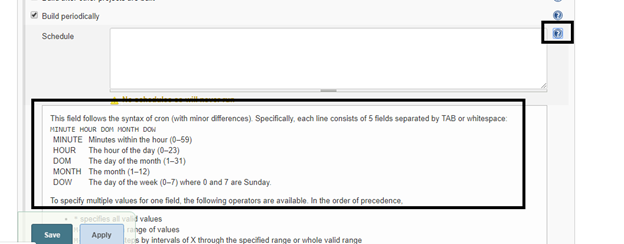
It’s a bit detailed description you can read it and set your time accordingly. For now, I am setting time for 15 mins i.e job will be executed after every 15 mins. Then click on Apply, a confirmation message of saved will appear on the screen.
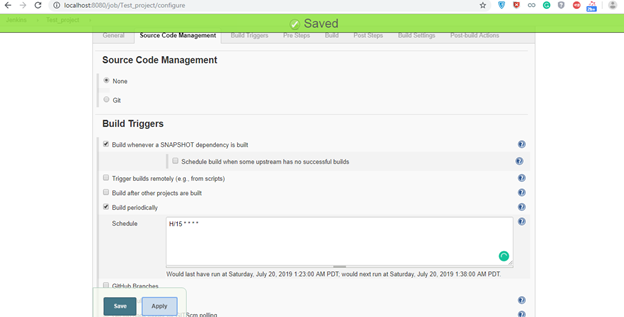
Now, go inside your job and wait for 15 mins you will notice a job automatically starts after every 15 mins.
This is how you can implement Jenkins in any of your projects.
Summary:
CI and CD are now one of the top trending topics. Implementing Jenkins in your project is very beneficial. Therefore, I would recommend it for your projects. These all are one-time efforts that do consume very much time as you first need to create test scripts then implement Jenkins but it saves your time in the future. So, don’t think just do it and set yourself up for greater efficiencies to greatly reduce development times.