

This is a step by step guide for React Native Developers to understand how to manage multiple environments in a React Native App for Android. Environment specific builds give us a way to:
Here we will be creating two versions of the same app with multiple flavors.
Scenario:
We had two applications, one for the sales team and other for marketing but 90% of the views of the applications were the same. So instead of creating two different applications, we used this approach to save our time and make code maintenance easier. We have used product flavors, build variants and react-native-config package to solve our problem.
react-native init myApp
Now run your android application by:
react-native run-android
After successful completion of installation, your directory structure looks like this:
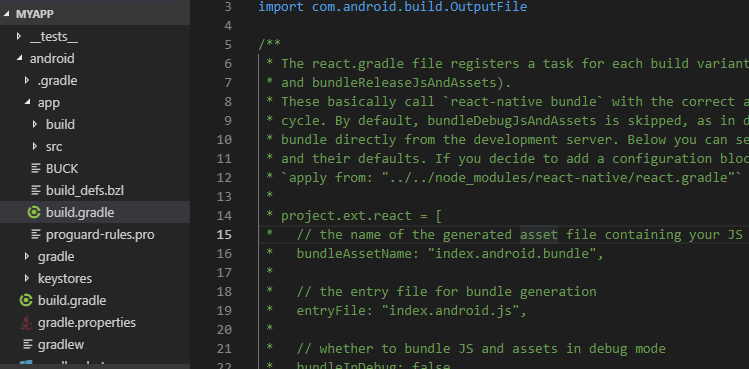
We will setup android multiple environments (apps) using product flavors.
1- Open the build gradle file: android/app/build.gradle
Add dot env gradle path on 2nd line:
apply from: project(':react-native-config').projectDir.getPath() + "/dotenv.gradle"
2- Add env configuration for sales and marketing environment.
project.ext.envConfigFiles = [
    marketing: ".env.marketing",
    sales: ".env.sales"
]
Don’t forget to use flavorDimensions “default”:
android {
    compileSdkVersion rootProject.ext.compileSdkVersion
    falvorDimensions "default"
    compileOptions {
        sourceCompatibility JavaVersion.VERSION_1_8
        targetCompatibility JavaVersion.VERSION_1_8
    }
    ...
}
3- The most important thing at the android end is to create product flavors.
Inside android/app/build.gradle add these lines:
android {
    compileSdkVersion rootProject.ext.compileSdkVersion
    falvorDimensions "default" // add this line
    compileOptions {
        sourceCompatibility JavaVersion.VERSION_1_8
        targetCompatibility JavaVersion.VERSION_1_8
    }
    productFlavors { //add this object
        marketing {
            applicationIdSuffix '.marketing'
            resValue "string", "build_config_package", "com.myapp"
        }
        sales {
            applicationIdSuffix '.sales'
            resValue "string", "build_config_package", "com.myapp"
        }
    }
    ...
}
Here we have created two product flavors: marketing and sales.
4- Create a launch screen and Icon for both the flavors
By default, the ‘res’ folder is inside src/main folder as shown below:

But If we want to have different icons and splash screens for the flavors (sales and marketing), create sales and marketing folders in src. Remember to keep the folder name same as product flavor name defined in build.gradle.
Now we have three folders: main, sales and marketing. Sales and marketing contain the icon, splash screens and application values. If something doesn’t exist in the product flavor directory, then main directory resources will be used.

So we have removed app/src/main/res and created a res folder inside the marketing and sales folder.
For using environment variable we will use react-native-config package.
npm install react-native-config --save
or
yarn add react-native-config
Then:
react-native link react-native-config
You can see documentation here: https://github.com/luggit/react-native-config
After installing this package create two env files at the root of your project. One for sales i.e .env.sales and one for marketing i.e .env.marketing

Now you can access environment variables using config module
import config from 'react-native-config';
if (config.VERSION === CONSTANTS.APP_VERSION.MARKETING) { //MARKETING
 //show marketing component layout
} else if (config.VERSION === CONSTANTS.APP_VERSION.SALES) {
 //show sales component layout
Run On Android:
In order to run your application on simulator add these in package.json inside ‘scripts’ tag
"scripts": {
    "salesbuild": "react-native runx-android --variant=salesDebug",
    "marketingbuild": "react-native run-android --variant=marketingDebug",
}
Create Unsigned Build:
For creating unsigned build or apk add these scripts in your package.json
"scripts": {
    "createbuild": "react-native bundle --platform android --dev false --entry-file index.js --bundle-output android/app/src/main/assets/index.android.bundle --assets-dest android/app/src/main/res"
}
For Sales Environment:
"scripts": {
    "salesbuildDebug": "cd android && SET ENVFILE=.env.sales && gradlew assemblesalesDebug"
}
For Marketing Environment:
"scripts": {
    "marketingbuildDebug": "cd android && SET ENVFILE=.env.sales && gradlew assemblemarketingDebug"
}
USA408 365 4638
1301 Shoreway Road, Suite 160,
Belmont, CA 94002
Whether you are a large enterprise looking to augment your teams with experts resources or an SME looking to scale your business or a startup looking to build something.
We are your digital growth partner.
Tel:
+1 408 365 4638
Support:
+1 (408) 512 1812


COMMENTS (0)
Tweet