

Since the WebRTC promises real-time communications from the browser with no downloads or plugins necessary, there are many companies who are providing hosted solutions with ready to integrate APIs easily in their software or websites. WebRTC technology has a great impact on the development of video conferencing market.
After the first browsers with support for WebRTC were released, the potential number of video conferencing endpoints around the world increased by a phenomenal 1 billion devices.
WebRTC solution of video conferencing is set to increase because of low cost, easy access and resolution of usual conference call challenges. In this article, we will discuss OpenTok, an easy to use and well integrated hosted solution.
OpenTok is a platform that allows developers to integrate live, group video chat directly into their web experience in a manner that makes most compatible to their web application interface.
Opentok gives ease to developers to implement one on one, group, many to one and even other types of video conferencing. With a native and fully integrated web experience, the user has complete control over the layout, sizing and animation of each individual video streaming.
By taking the complexity of operating and running a real-time video chat infrastructure off the developers’ plate, OpenTok lowers the barrier for the integration of video chat. A video call or video meeting is directly accessed through the web browser without having to download or install anything, and there is no software to update.
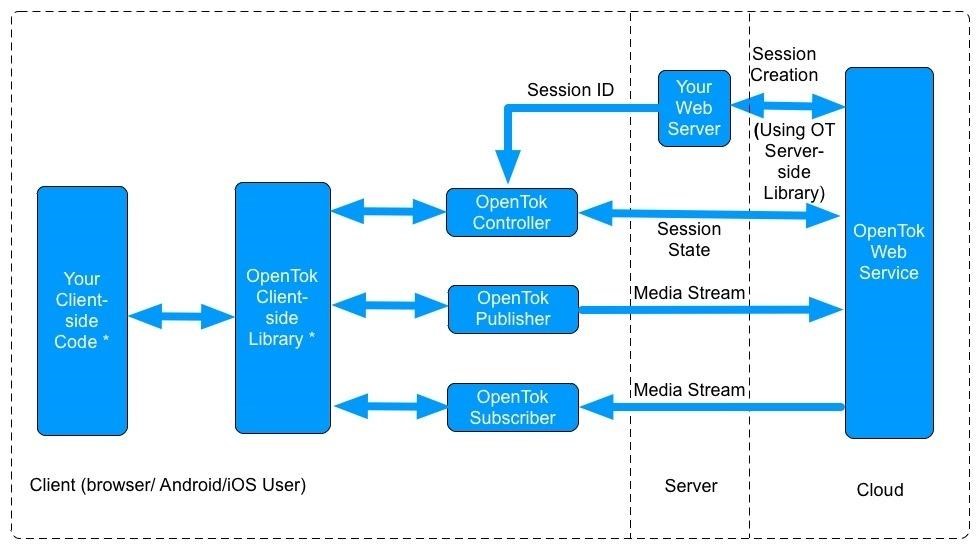
Let’s go through the basic implementation of OpenTok by utilizing OpenTok.js, OpenTok’s client-side library for the web to quickly and easily build a real-time interactive video application. This will demonstrate OpenTok session, display any existing streams and publish a video steam to the session.
Open Tokbox Signup page and sign up for a free trial account. After verifying your email you’ll be on the dashboard:
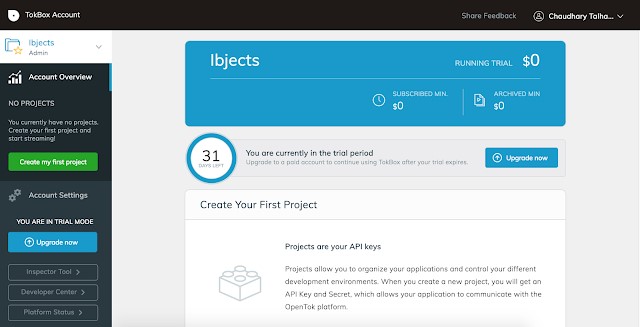
Create a new project by clicking on the green button on left “Create my first project”.
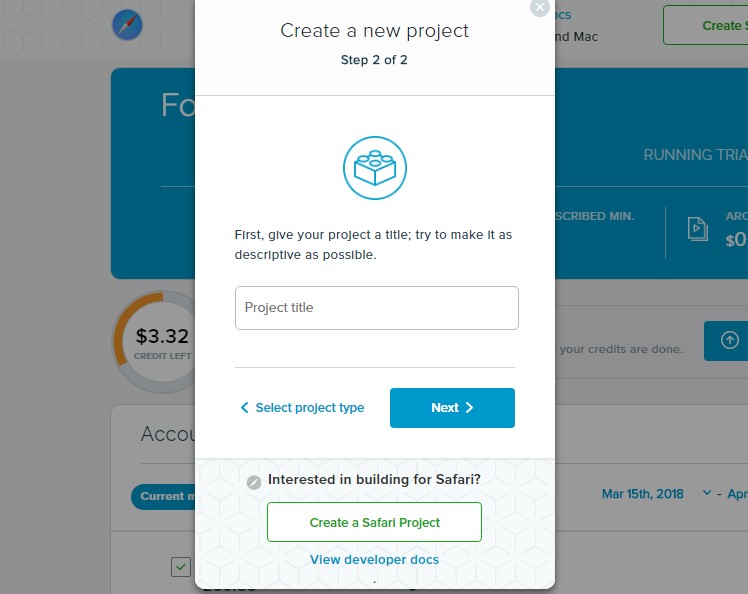
After you finish making the project, you’ll be taken to the project where you can see your API key and Secret key. You’ll be using them later in the app.
Add the OpenTok JavaScript library, the section of the webpage includes the following line:
<script src="/assets/js/opentok.js"></script>
To initiate or connect to OpenTok session three major components are needed:
Let’s add those.
<script type="text/javascript">
     var apiKey = 1127; // OpenTok sample code key. Replace with your own API key.
     var sessionId = ‘’; // Replace with your session ID.
     var token = 'devtoken'; // Should not be hard-coded.
</script>
The first step in using an OpenTok session is to create and initialize a Session object. You initiate a Session object by calling the OT.initSession() method with the session ID pertaining to the OpenTok session:
session = OT.initSession(apiKey, sessionId);
After the initialization, Connect the session by calling the connect() method of the session object. It takes one argument: the API key.
var session;
session = OT.initSession(sessionId);
function connect() {
  session.connect(apiKey, callBackFunction());
}
After initiating the session, create the publisher.
The application initializes an OpenTok publisher object with OT.initPublisher(). This method takes three optional parameters:
The third parameter (not present in our code) specifies the completion handler.
// Create a publisher
var publisher = OT.initPublisher('publisher', {
  insertMode: 'append',
  width: '100%',
  height: '100%'
}, handleError);
Now on this stage, running a code will connect with the session, create publisher and start publishing stream to connected session.
To subscribe to other stream on same session we now need to subscribe to the session. We simple put the hook of StreamCreated.
session.on('streamCreated', function(event) {
  session.subscribe(event.stream, 'subscriber', {
    insertMode: 'append',
    width: '100%',
    height: '100%'
  }, handleError);
});
When a new stream is created, session object dispatch the event streamCreated and session.subscribe will subscribe to that stream.
Congratulations, you have made your first video conferencing solution.
USA408 365 4638
1301 Shoreway Road, Suite 160,
Belmont, CA 94002
Whether you are a large enterprise looking to augment your teams with experts resources or an SME looking to scale your business or a startup looking to build something.
We are your digital growth partner.
Tel:
+1 408 365 4638
Support:
+1 (408) 512 1812


COMMENTS (0)
Tweet