

First of all we need to Download SpagoBI from here
http://forge.ow2.org/project/showfiles.php?group_id=204
We have to download All-In-One-SpagoBI-5.2.0 and run it. After creating SpagoBI by using Talend studio as shown in our blog named “How to create ETL job by using Talend” we will deploy it on SpagoBI and schedule it.
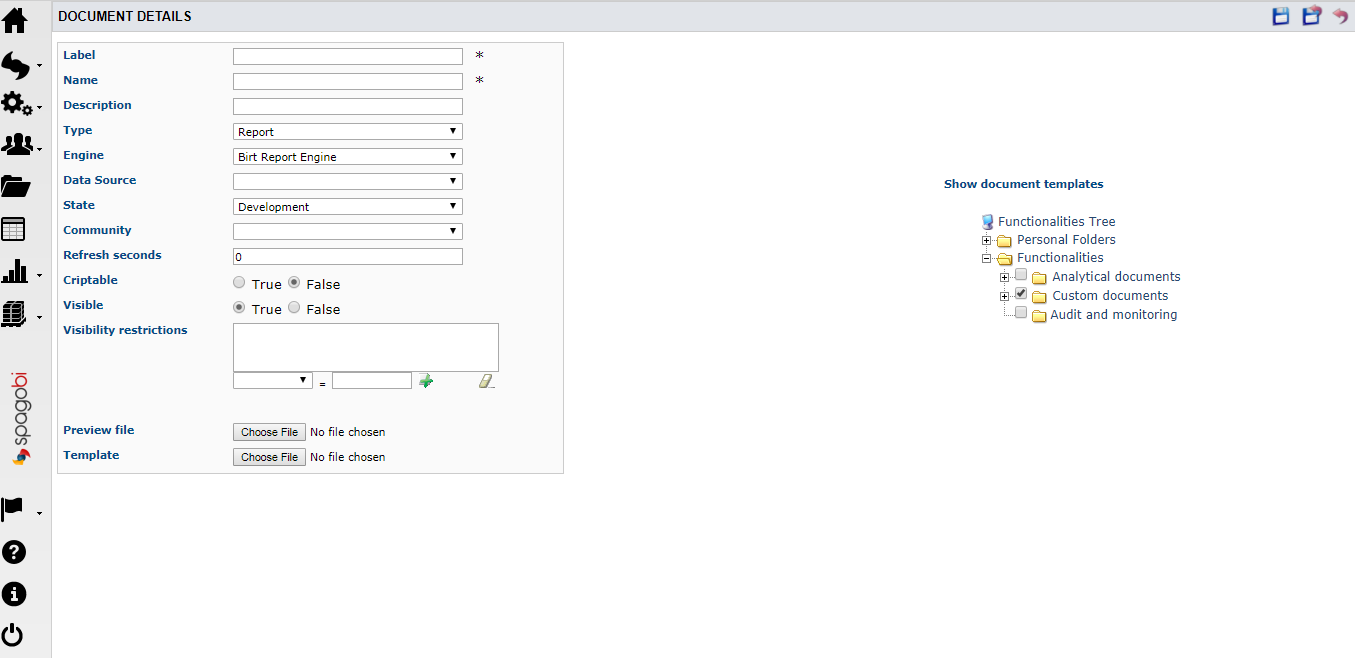
Next, we will go to home page and select “Document Development” -> “Custom Document” (or any folder) -> “Create Document” -> “Generic Document”. It will open a window where we need to configure document for our deployed ETL process.
xml document contains XML like:
<?xml version="1.0" encoding="UTF-8"?>
<etl>
    <job context="Default" jobName="test" language="java" project="Project"/>
</etl>
Insert this xml document in the template and then save the document.
Next step involves creating SpagoBI document for Talend Etl process. So schedule this document by selecting “Repository Management” -> “Schedular” from the left panel. It opens another window shown in figure.
Click on Scheduler to open it in a new window as shown in the figure below.
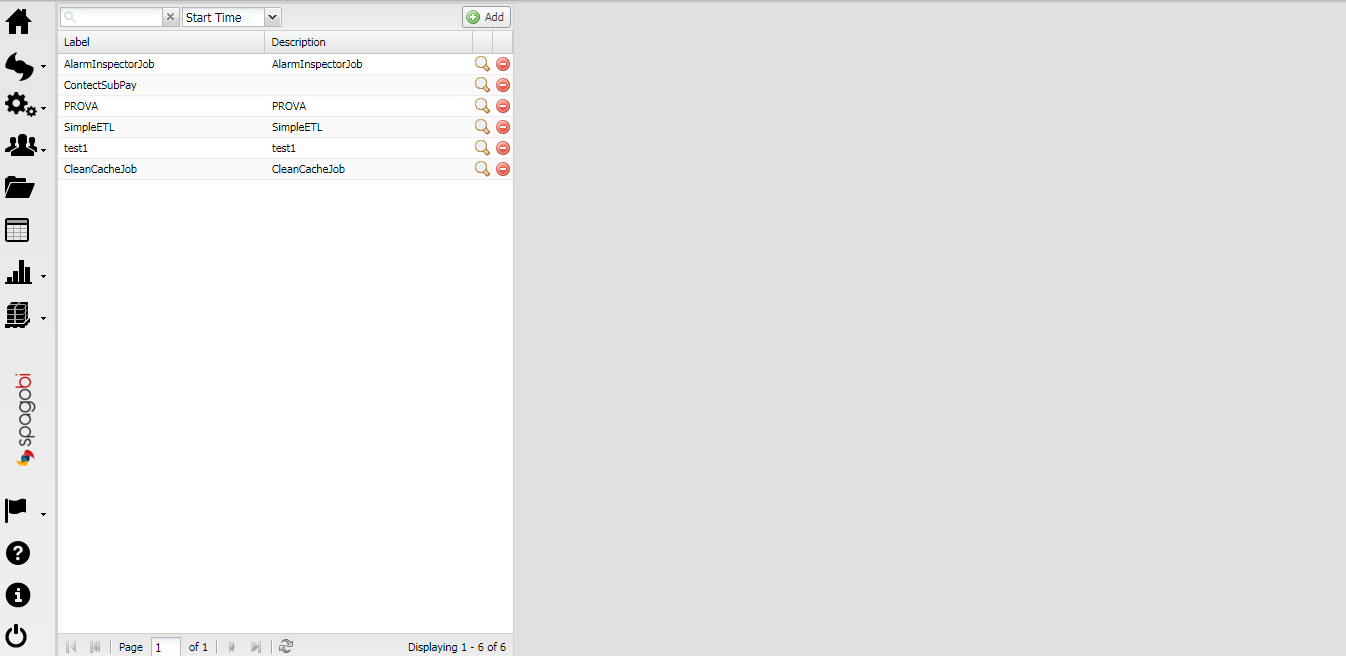
From here we click on Add button and then add new scheduler as shown.
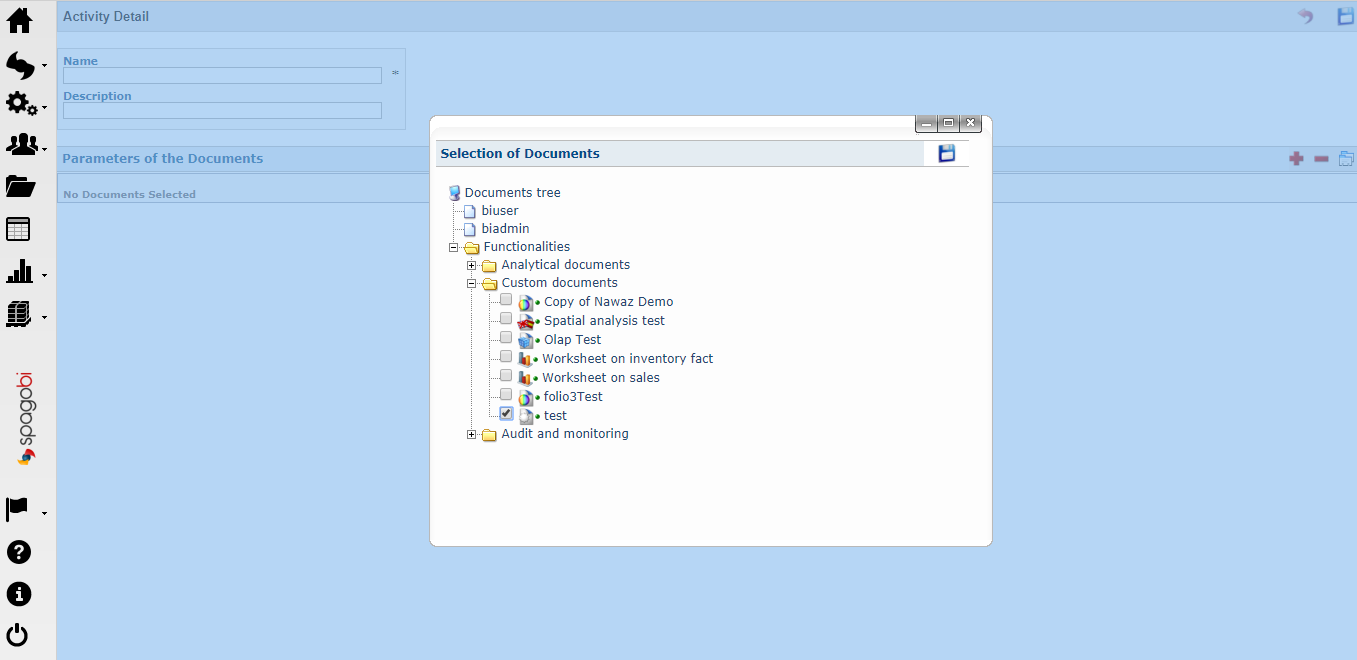
In order to add scheduler we have to fill the fields listed below:
Save this configuration we have to add configuration of schedule for running it.

Click on bottom tab “Scheduletions” add button and it will open a window shown in figure.

For Scheduletion we have to fill the fields below:
There are some other options as well such as you can also sent this document in email to any one by configure Send Email and so on.
After saving this configuration, our ETL document will be successfully configured and will run on scheduled time.
USA408 365 4638
1301 Shoreway Road, Suite 160,
Belmont, CA 94002
Whether you are a large enterprise looking to augment your teams with experts resources or an SME looking to scale your business or a startup looking to build something.
We are your digital growth partner.
Tel:
+1 408 365 4638
Support:
+1 (408) 512 1812


COMMENTS (0)
Tweet