

A Mirth Connect engine, with its own filters and transformers, is the medium for the source and destination systems. Messages flow into a source connector, pass through a pre-processor script, are converted to XML, pass through filters (that may be on the source side), then through any transformers. The transformed message is encoded, and flows to the destination connector.

Channels
Channels serves as the conduit between a source system and one or more destination systems.
Connectors
Mirth Interface engine links to external systems via one source connector and one or more destination connectors. Supported protocols include LLP, TCP, HTTP, HTTPS (Silver-/Gold-/Platinum-level support only), JMS, File, and Database.
Each connector type has its own properties that you configure via the Edit Channel page > Source or Destinations tab (e.g., under Connector Type – File Reader Settings > Method bar > ftp, you can configure the server address, file-pattern settings, polling frequency, etc)
Filters
Filters are composed of a series of rules evaluated as Boolean expressions. If these rules are evaluated as True, the message is processed by the connector. Each Source and Destination connector has its own filters, but you can use filters on a Destination connector to route messages to specific destinations.
Transformers
Transformers are composed of steps that are executed in order and that let message data be changed, extracted for later use, or used to create a new message. Each connector has its own set of transformers.
The example will involve the configuration for HL7 v2.x messages using and LLP connection, extract some patient data such as name and address from the message, and transfers data to any configured Email server.
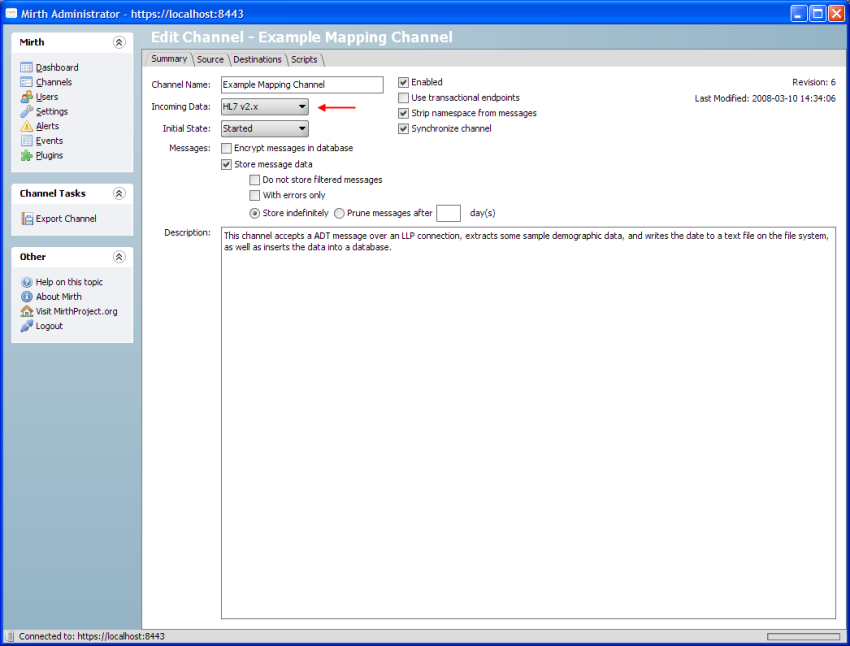
Step 1: Create a new channel, making sure that the Incoming Data field is set to HL7 v2.x
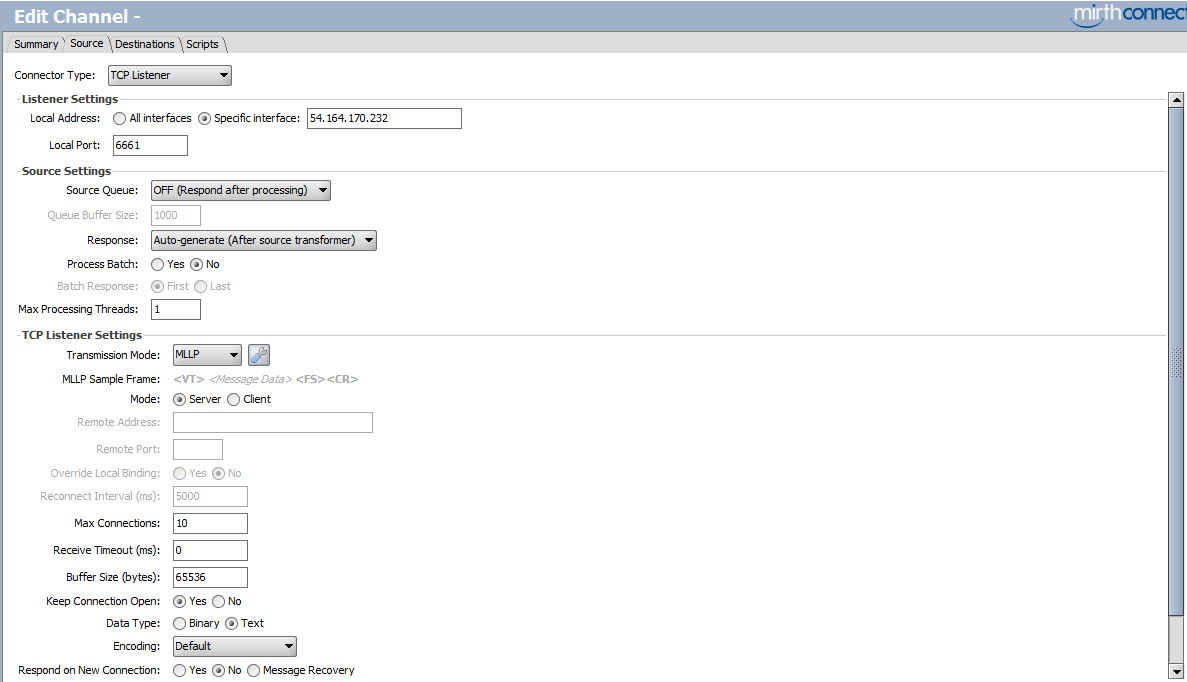
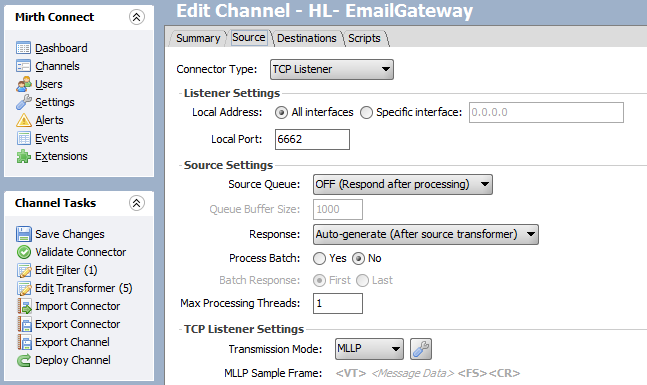
Step 2: Set the Source connector type to LLP Listener and configure any listener properties as needed. In this example, Mirth is listening for HL7 messages on specific interface with port 6661 (other settings are default).
You can also configure source listener to any of the available protocols.
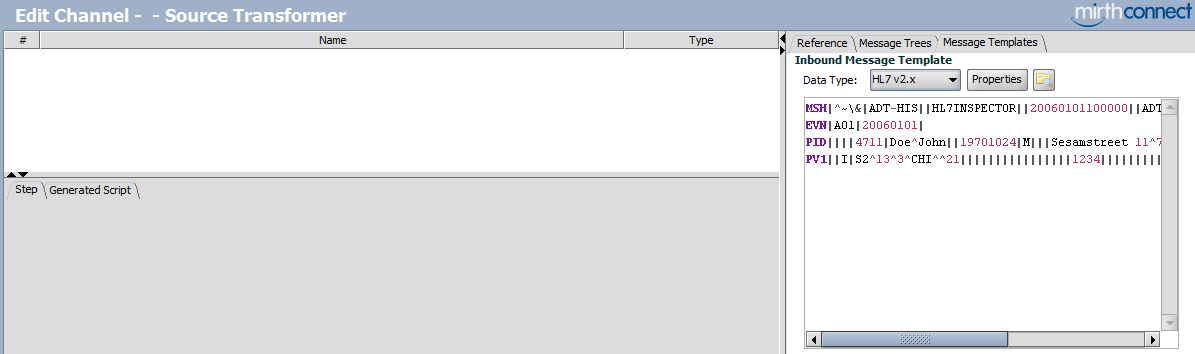
Step 3: Edit the Transformer for the Source connector and paste in a sample HL7 message into the Inbound Message Template field on the Message Templates tab.
a.In the Mirth Connect panel, click ‘Edit Transformer’ under ‘Channel Tasks’ section.
b.On the Edit Transformer page, click on Messages Templates and paste in a sample HL7 message in Inbound Message Template field
Step 4: Click on the Message Trees tab to view the tree generated for the Inbound Message Template. Right-clicking on any node in the tree displays a context menu to expand and collapse nodes in the tree.

Step 5: Drag nodes from the tree to the Transformer area to create new Mapping steps.
a.Click on ‘Add New Step’ in the Transformers tasks from left panel
b.Enter variable name and drag and drop field value from message tree
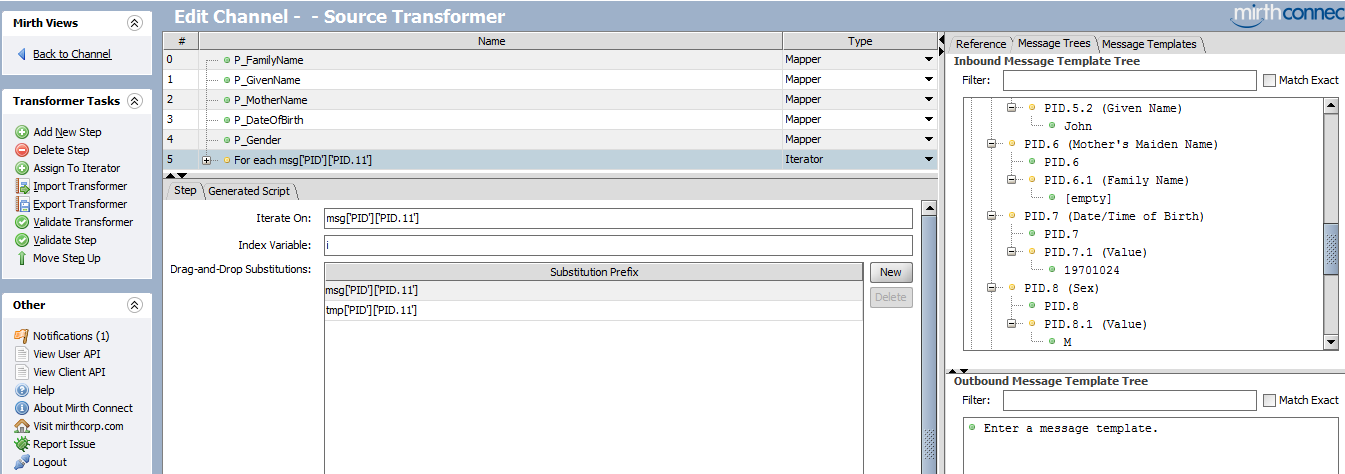
Repeat step 5 for all the variable mappings required to extract patient information and return back to Channel.
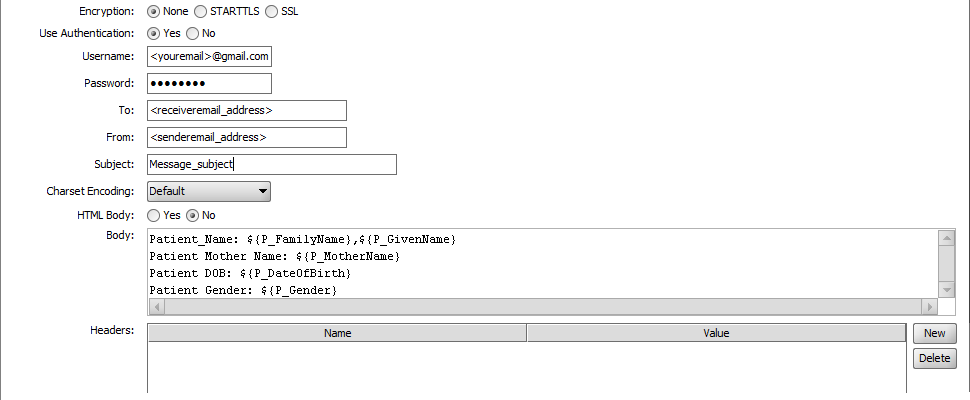
Step 6: In the Destinations area, create a new SMTP Sender type connector to transfer messages to HipLink through Email Gateway
a.On ‘Edit Channel’ page click on Destination tab
b.From ‘Connector Type’ select ‘SMTP Sender’
c.In ‘SMTP Sender Settings’ put:
i.SMTP Host: smtp.gmail.com
ii.SMTP Port: 587

d.Set ‘Use Authentication’ to Yes and enter.
i.Username: <your_gmail_address>
ii.Password: <your_password>
e.In ‘To’ field enter recipient email address.
f.In the body field define the necessary patient information mapping by drag and dropping the variables from right panel and Save changes.
Step 7: If you wanted to do a message filtering then create a new rule of type Rule Builder that only accepts messages with a specific value (In this example we will accept messages with type ADT only).
a.On ‘Edit Channel’ page click on Source tab.
b.From Left panel click on Edit Filter.
c.On Edit Filter screen, click on ‘Add New Rule’
d.From right panel, click on Message Tree tab and expand ‘Message Header’
e.Drag ‘ADT’ node from Message Type and drop in Rule text field.
f.Click on New button on Rule value screen, Type “ADT” and go back to Channel.
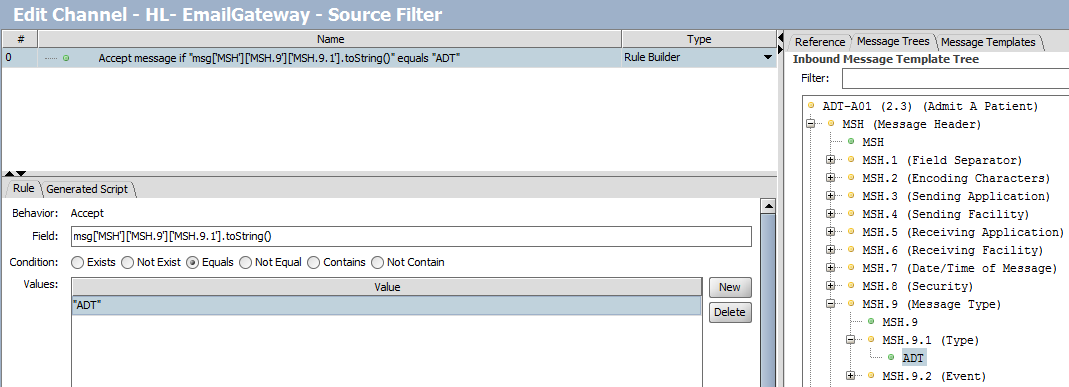
Field is specified through drag and drop of a node from the Inbound Message Template Tree if it has been specified.
When the channel is deployed and a message is received, a message will be sent to this destination only if the filter accepts the message.
Step 8: Save Changes and Deploy Channel.
Step 9: Send a test message and verify this integration
a.On Dashboard click on deployed channel.
b.From right pane under ‘Dashboard Tasks’ click on ‘Send Message’
c.Copy paste any HL7 message in send message popup and Process Message.
If everything is configured correctly, the message should be received successfully by the configured receiver.
USA408 365 4638
1301 Shoreway Road, Suite 160,
Belmont, CA 94002
Whether you are a large enterprise looking to augment your teams with experts resources or an SME looking to scale your business or a startup looking to build something.
We are your digital growth partner.
Tel:
+1 408 365 4638
Support:
+1 (408) 512 1812


COMMENTS (0)
Tweet